Google Tag Manager
Using UXCam with Google Tag Manager (GTM) will allow you to efficiently manage and deploy the UXCam script across your website.
Step 1: Adding the UXCam Script via Custom HTML Tag
- Create a New Tag in GTM:
- Log in to your Google Tag Manager account.
- Go to the workspace for the website where you want to integrate UXCam.
- Click on "Tags" in the left-hand menu, then click on "New."
- Configure the Tag:
- Select tag configuration - Tag Type: "Custom HTML."
- Replace
'Your_App_Key'in the following HTML code with the App Key from your UXCam platform - Paste the UXCam script into the HTML section, as shown below:
<script type="text/javascript" defer="">
(function(appKey, opts) {
    window.uxc = {
        __t: [],
        __ak: appKey,
        __o: opts,
        event: function(n, p) {
            this.__t.push(['event', n, p]);
        },
        setUserIdentity: function(i) {
            this.__t.push(['setUserIdentity', i]);
        },
        setUserProperty: function(k, v) {
            this.__t.push(['setUserProperty', k, v]);
        },
        setUserProperties: function(p) {
            this.__t.push(['setUserProperties', p]);
        },
    };
    var head = document.getElementsByTagName('head')[0];
    var script = document.createElement('script');
    script.type = 'text/javascript';
    script.src = '//websdk-recording.uxcam.com/index.js';
    script.async = true;
    script.defer = true;
    script.id = 'uxcam-web-sdk';
    script.crossOrigin = 'anonymous';
    head.appendChild(script);
})('yourAppKey', {});
</script>- Set the Trigger:
- For the UXCam script to run on all pages, configure the trigger as "Page View - All Pages."
- This will ensure that the script is executed whenever a page is viewed on your website.
- Save and Publish:
- After configuring the tag and trigger, save your changes.
- Click "Submit" to publish the changes, making the UXCam script active on your website.
Step 2: Sending Events and properties to UXCam
You can use Google Tag Manager (GTM) to send custom events to UXCam. This includes sending dataLayer variables as event properties to help you track meaningful user actions with context. Whether you already have a dataLayer and variables configured, or you’re working with a basic setup, this guide covers both approaches:
UsingdataLayer
To track user interactions using Google Tag Manager (GTM), there’s no need to manually implement a dataLayer if you’re only using GTM’s built-in triggers such as clicks, form submissions, scroll depth, element visibility, or timers. GTM handles these natively and can detect and fire tags based on these events without requiring any custom JavaScript or code changes. Manual dataLayer.push() are only necessary when tracking custom events or variables that aren’t detectable through GTM’s built-in functionality, such as backend-driven logic or specific user states (e.g user authentication, purchase confirmation, checkout completion etc.)
Note
Highlights information that users should take into account, even when skimming.
Tip
Optional information to help a user be more successful.
Important
Crucial information necessary for users to succeed.
Warning
Critical content demanding immediate user attention due to potential risks.
Caution
Negative potential consequences of an action.
Success
Negative potential consequences of an action.
| Approaches | |
|---|---|
| 1 | Teams Without a Data Layer Setup - Need to Push Data to Data Layer, Define variables, and Create event tags |
| 2 | Teams with Data Layer and User Variable already Setup - Need to only Create event tags |
| 3 | Using GMT built-in triggers - Need to only Create event tags |
Push Data to the Data Layer
dataLayer.push() is used to defines the event and supplies Data values to the GTM data layer when a user action happens.
dataLayer.push({'variable_name': 'variable_value'})Example
**event**: The name used to trigger your tag in GTM (e.g., ‘AddToCart)
**Item, ItemPrice**: Values you want to send as event properties
window.dataLayer = window.dataLayer || [];
window.dataLayer.push({
  event: 'AddToCart',
  Item: 'Shoes',
  ItemPrice: 49.99
});
Define Variables in GTM
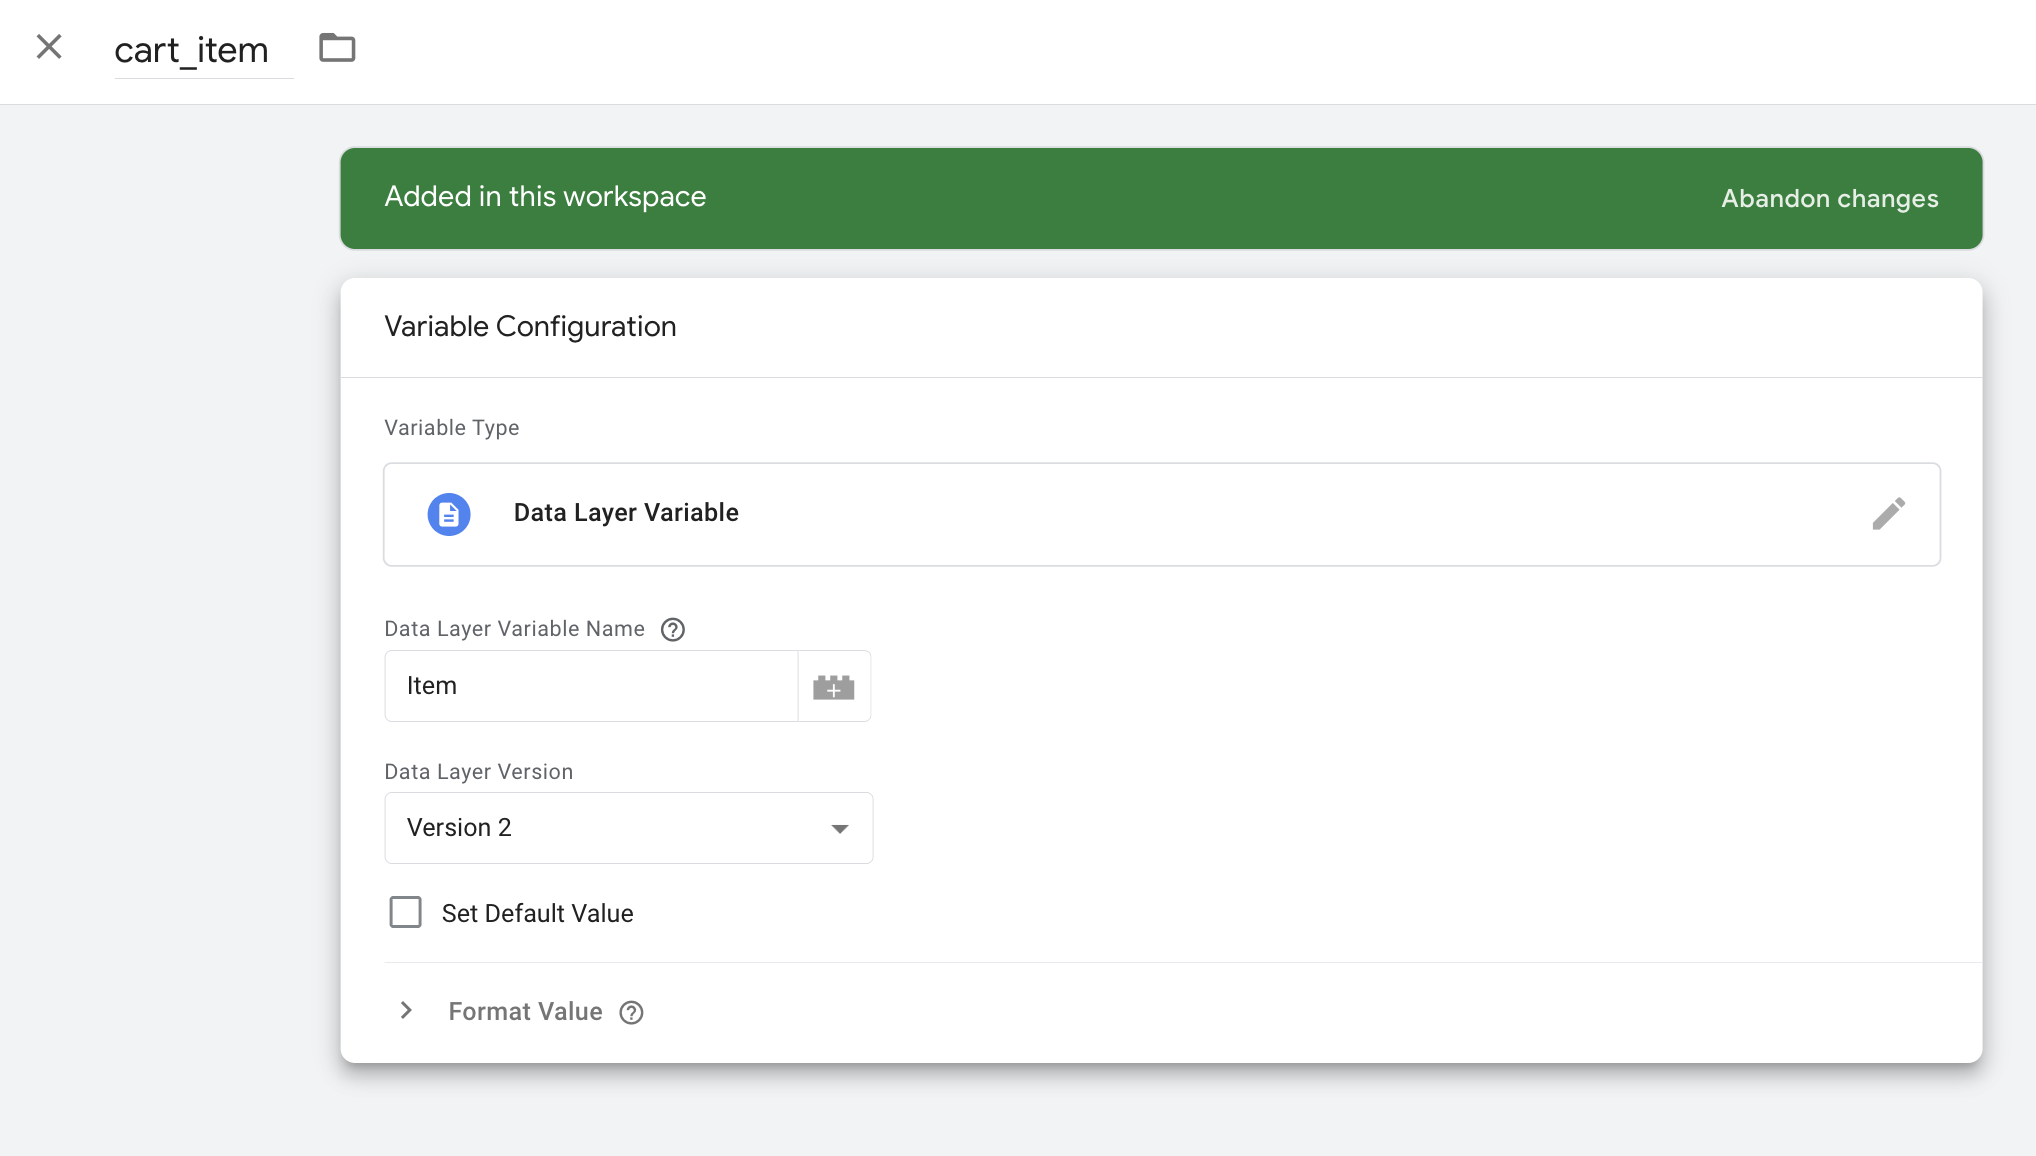
Variables pull specific pieces of information out of the dataLayer so they can be used inside Tags and Triggers.
- Click on "Variables" in the left-hand menu
- In the 'User-Defined Variables' section, click on 'New', and select 'Data Layer Variable'
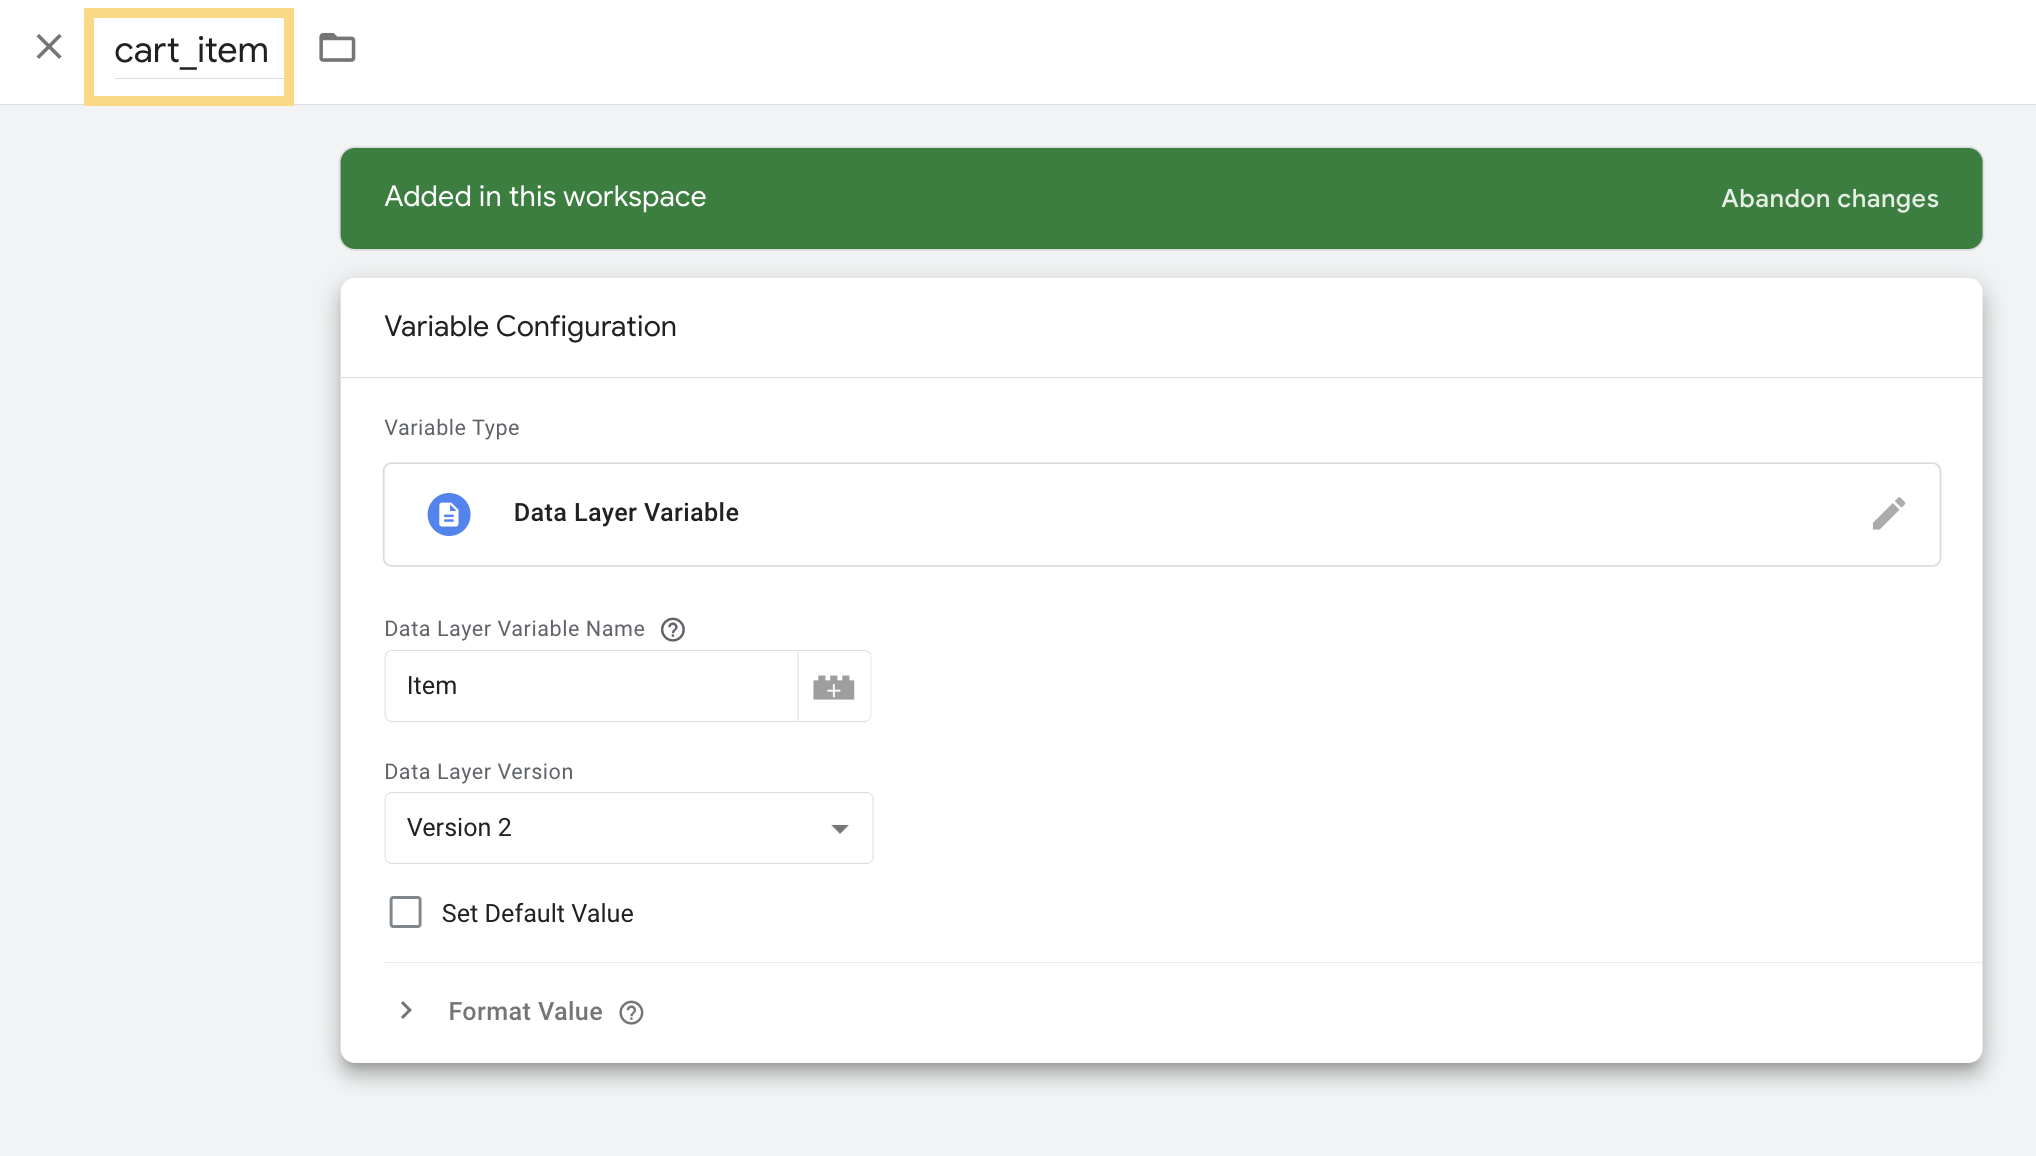
- Give the variable a recognisable name in the top left of the screen (e.g. Item_Price)
- Set the Data Layer Variable Name to match the key in the dataLayer.push (e.g., item, itemPrice)
- Save the Variable
- Repeat this for each data layer value you want to use
Note
Highlights information that users should take into account, even when skimming.
Tip
Optional information to help a user be more successful.
Important
Crucial information necessary for users to succeed.
Warning
Critical content demanding immediate user attention due to potential risks.
Caution
Negative potential consequences of an action.
Success
Negative potential consequences of an action.
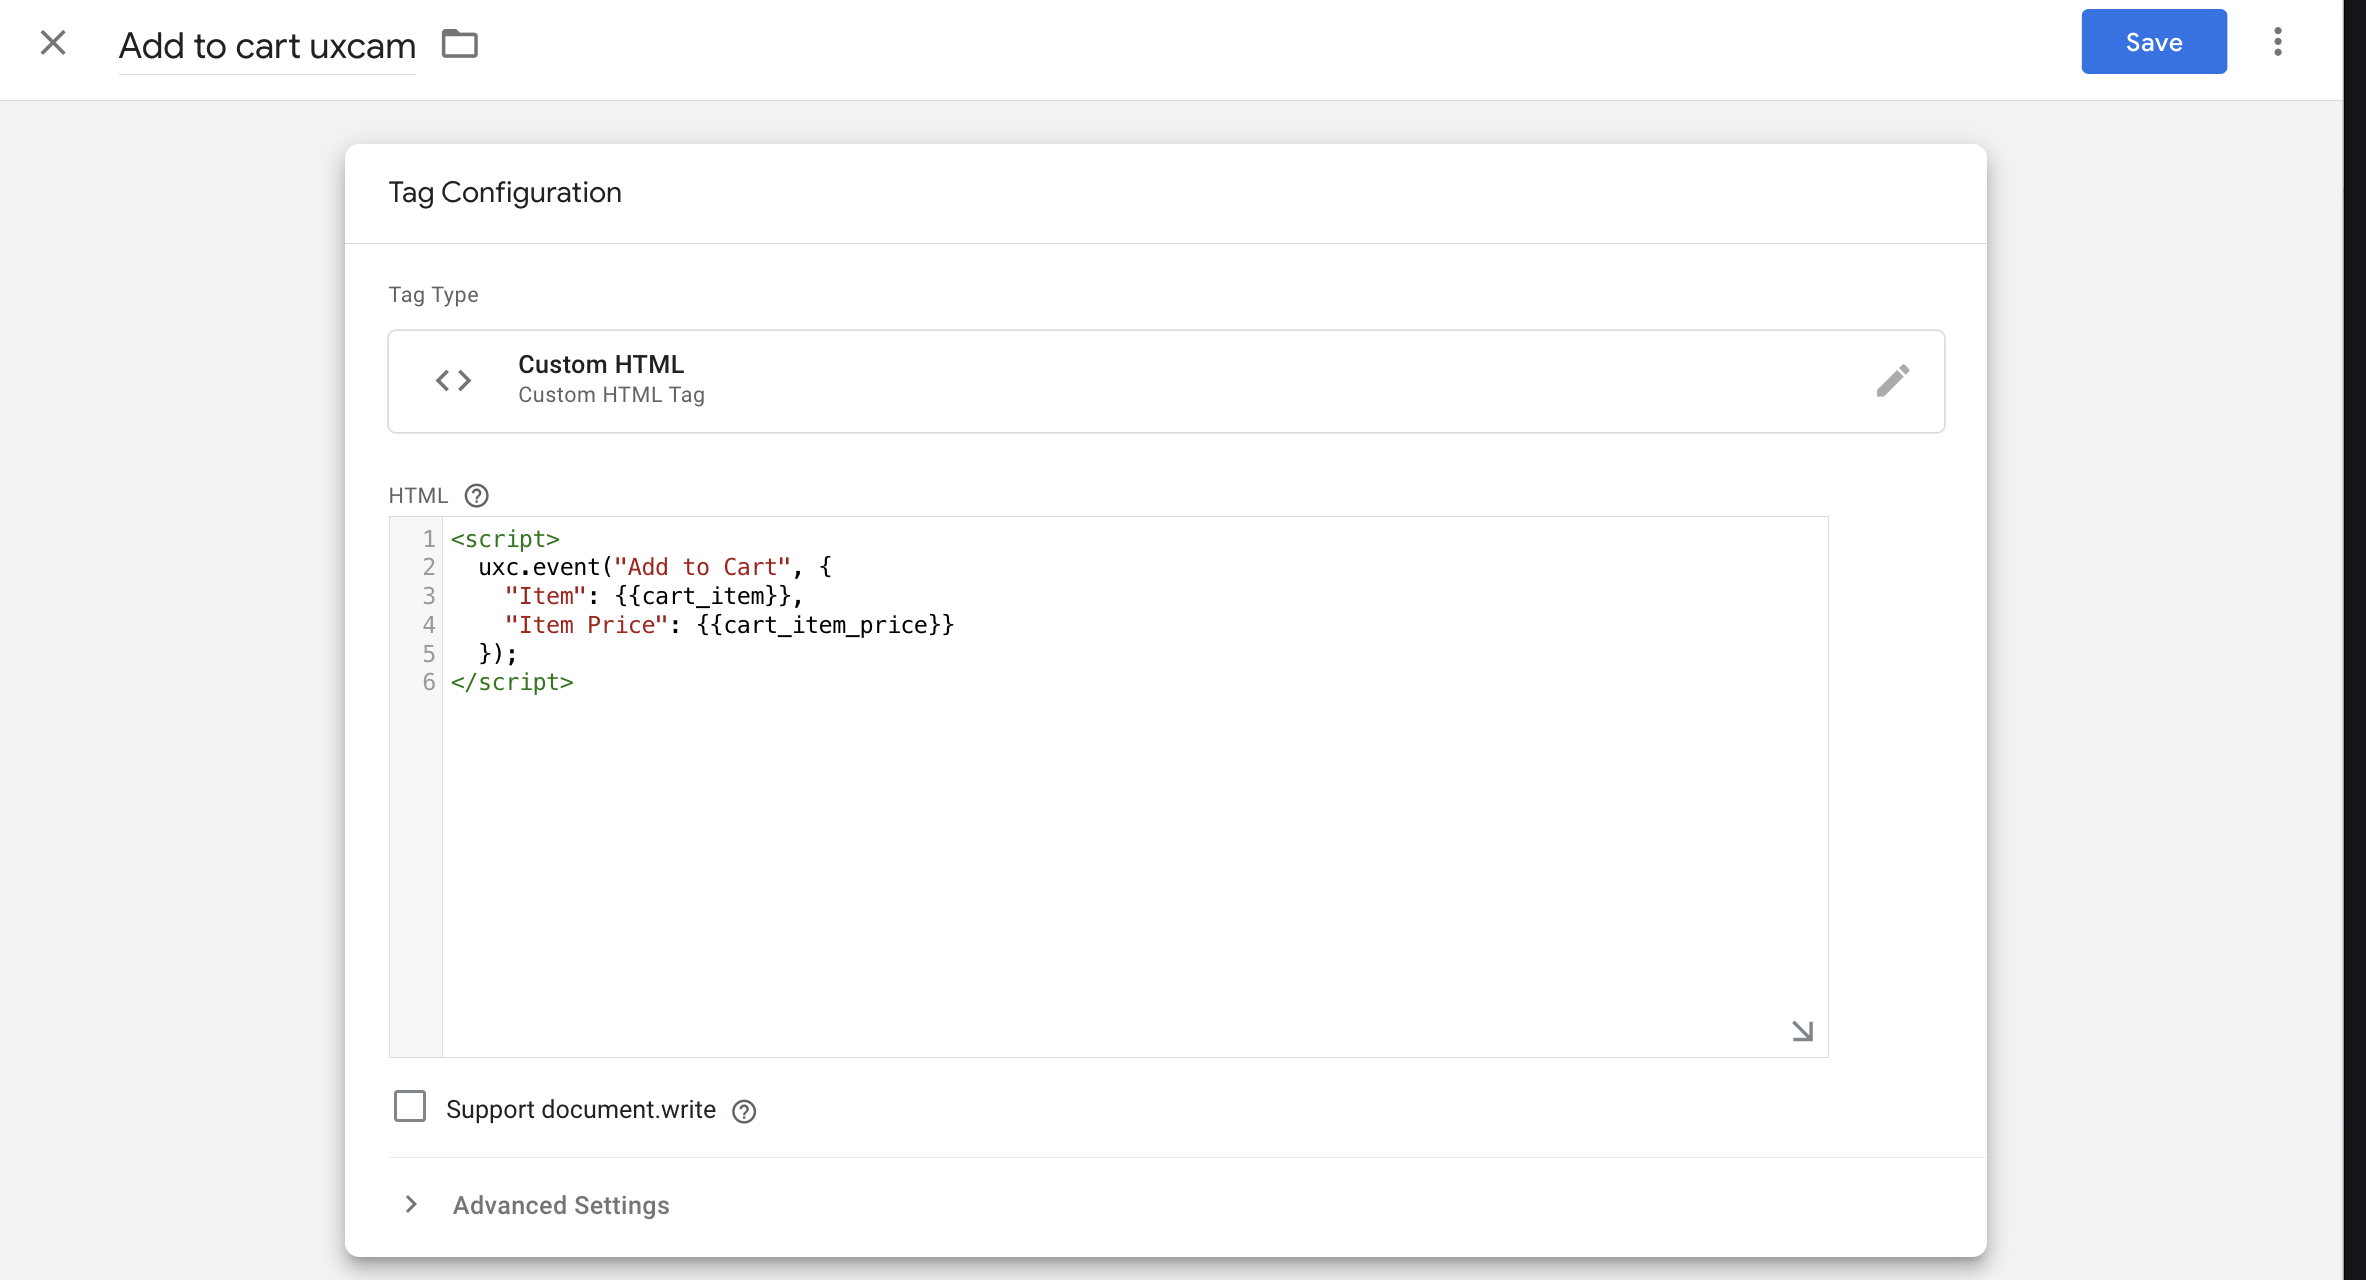
Create Event Tags and set the triggers
The event tag defines the action of sending the event to UXCam
- Create a New Tag for Events:
- Navigate to "Tags" in the left-hand menu, then click on "New."
- Select 'Tag configuration' - Tag Type: "Custom HTML."
- Add Event Script inside the HTML box with the relevant values
You can configure multiple events similarly by changing the event name and properties.
- Set the Trigger:
- In case you want the event to fire when a user clicks a button; select from the list or create a new trigger:
- Click on 'Triggering' and add a new trigger by clicking on the plus (+) button
- Select 'Click - All Elements' from the list and select 'Some clicks' option on when the trigger fires
- Select the Click classes -> equals -> submitButton, and click 'Save'
- Select the new trigger to be added to the Tag, and Save
Note
Highlights information that users should take into account, even when skimming.
Tip
Optional information to help a user be more successful.
Important
Crucial information necessary for users to succeed.
Warning
Critical content demanding immediate user attention due to potential risks.
Caution
Negative potential consequences of an action.
Success
Negative potential consequences of an action.
Step 3: Test
Use Preview mode in GTM to trigger the event on your website. Steps to confirm:
- The tag fires when expected
- Variables are populated correctly
- Events show up in UXCam (in the session timeline or event page)
- Once confirmed, publish your GTM container.
Step 4: Publish
- Publish your GTM container by clicking on 'Submit' button
- Review the changes and click on 'Publish'
Note
Highlights information that users should take into account, even when skimming.
Tip
Optional information to help a user be more successful.
Important
Crucial information necessary for users to succeed.
Warning
Critical content demanding immediate user attention due to potential risks.
Caution
Negative potential consequences of an action.
Success
Negative potential consequences of an action.
Next steps - Setup and configuration
Note
Highlights information that users should take into account, even when skimming.
Tip
Optional information to help a user be more successful.
Important
Crucial information necessary for users to succeed.
Warning
Critical content demanding immediate user attention due to potential risks.
Caution
Negative potential consequences of an action.
Success
Negative potential consequences of an action.
Support
For questions or support, reach out to us at [email protected].
Updated 12 months ago