SwiftUI UXCam package
NoteAll UXCam properties and methods are also available in UXCamSwiftUI without additional import of UXCam and can be accessed using
UXCamCore. For eg. UXCam.isRecording() can be accessed into UXCamSwiftUI as UXCamCoreSwiftUI.isRecording()

SDK Integration
If you're building your app using SwiftUI, please integrate UXCam using Swift Package Manager or Cocoapods using the following steps:
Cocoapods
- Add to the Podfile
pod 'UXCamSwiftUI'- Run
pod installin the project directory to download dependency.
Swift Package Manager
Add UXCamSwiftUI Package:
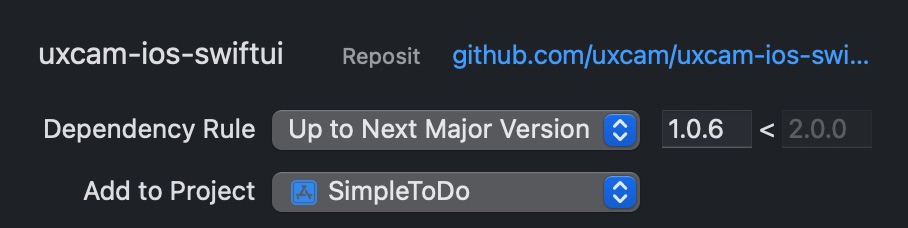
https://github.com/uxcam/uxcam-ios-swiftui
Securely load your App Key
Where | How-To | Pros / Cons |
|---|---|---|
Info.plist placeholder (recommended) | Add UXCamAppKey = $(UXCAM_APP_KEY) to Info.plist and define UXCAM_APP_KEY as a User‑Defined build setting (or in an ignored .xcconfig). |
|
CI env var injection | Add |
|
Runtime fetch (remote config) | Download the key from your config service before initialising UXCam. |
|
// Bundle-based lookup (works for techniques 1 & 2)\
let appKey = Bundle.main.object(forInfoDictionaryKey: "UXCamAppKey") as! String
Initialization Steps:
- Import UXCam at the top of your main App struct:
import UXCamSwiftUI- Add an init method to your main App struct and add the following calls:
@main
struct MyApp: App {
    init() {
        // 1. Opt‑in for wireframe screenshots (App Store review safe)
        UXCamCore.optIntoSchematicRecordings()

        // 2. Build configuration
        var config = Configuration(appKey: appKey)
        config.enableAutomaticScreenNameTagging = true // default

        #if DEBUG
        // 🔍 Verbose integration logs only in Debug builds
        config.enableIntegrationLogging = true
        #endif

        // 3. Start UXCam
        UXCamSwiftUI.start(with: config)
    }

    var body: some Scene {
        WindowGroup {
            ContentView()
        }
    }
}
| Where | When to Use | Code Snippet |
|---|---|---|
| SceneDelegate in mixed projects | You migrated screen‑by‑screen and still have a SceneDelegate. | Call the same init block in scene(_:willConnectTo:options:). |
| WidgetKit extension | Record interactions inside a widget. | Import UXCamSwiftUI in the widget’s @main and call UXCamSwiftUI.start in init(). |
| Preview mode | Avoid SDK traffic in SwiftUI previews. | Guard with if ProcessInfo.processInfo.environment["XCODE_RUNNING_FOR_PREVIEWS"] != "1". |
That completes the integration process.
Your session will be shown on the dashboard within a few seconds after the app goes in the background. You can optionally use the API's for customizations such as identifying users from your database with UXCam, tagging sessions or hiding sensitive views.
WarningScreen Tagging and Hiding Sensitive Data for Swift UI have some differences and you can check some examples on the documentation, all other customization APIs provided by UXCam can be called regularly done with iOS by importing UXCam and calling the desired method.
Updated 10 months ago