Sensitive Data Occlusion and Screen Blurring
UXCam ensures that as a controller you can use our platform and fulfil your obligations under GDPR. However, if you collect any PII data in your app such as email address, phone, or credit card number you should use our API to hide it.
You can choose to hide:
- Texts: when you only collect PII data with text fields
- Screen Views: when you need to hide a specific section of your screen.
- Screens: when you need to hide the whole screen, e.g. payment screen.
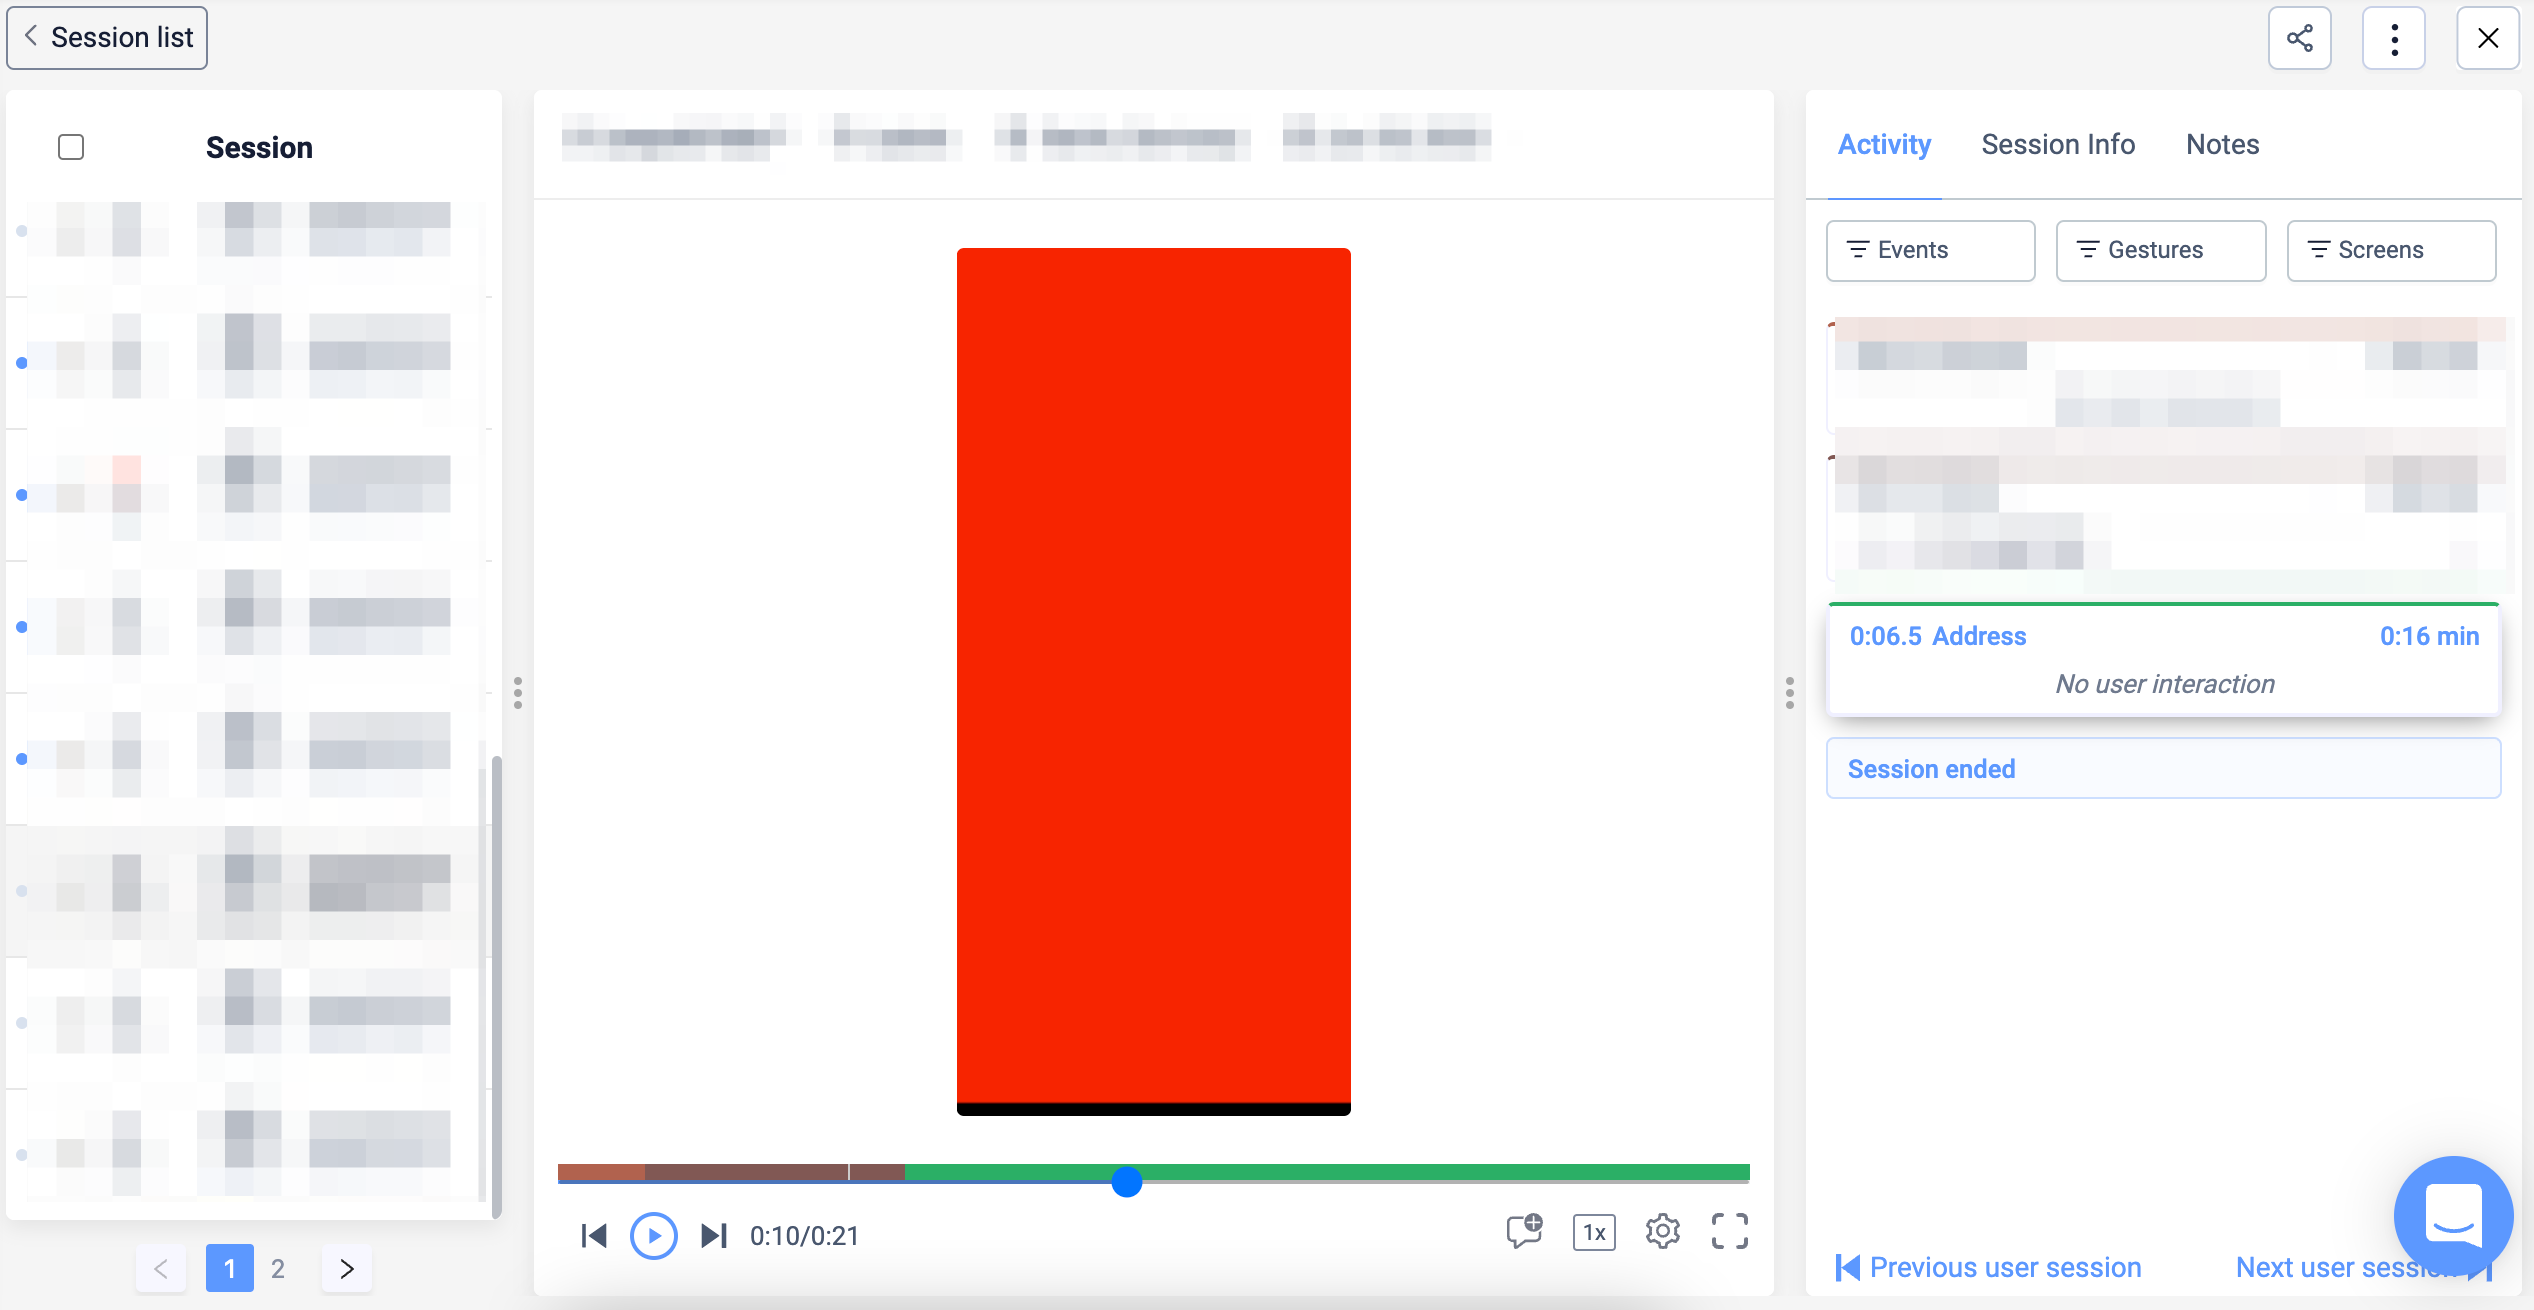
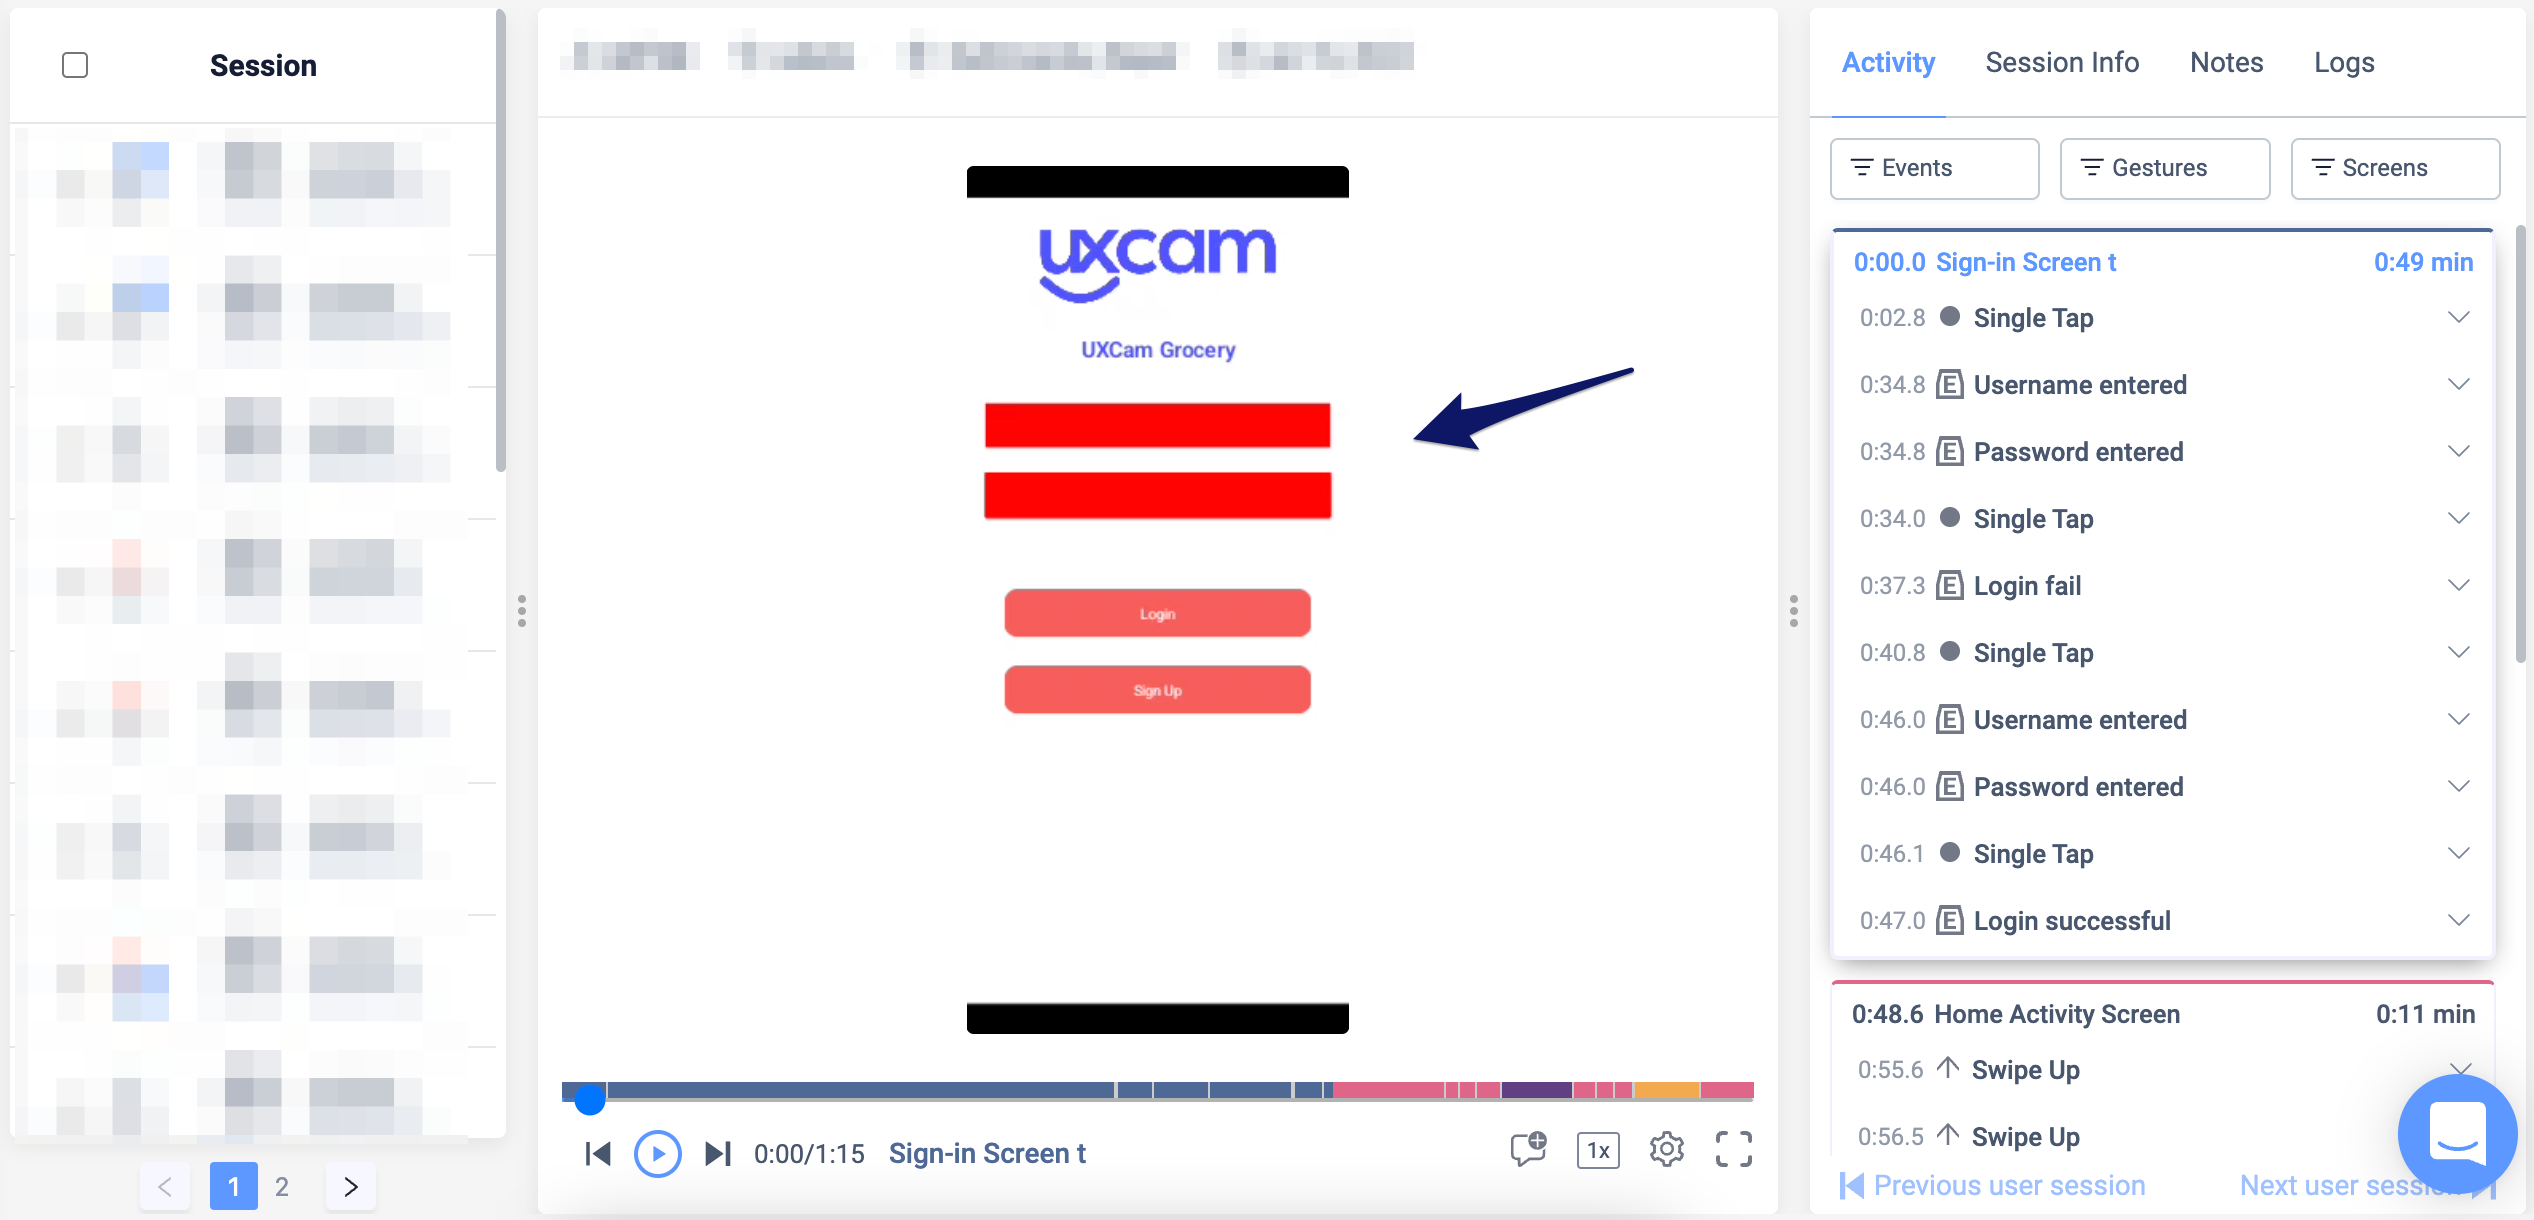
Sensitive information will be hidden under red boxes or blurred screens on the device before rendering the video and therefore never sent to UXCam. Make sure that all this info is hidden before releasing your app to production to make sure your users' PII is never recorded.
Please keep in mind that when hiding sensitive information you can still record gestures for that view or screen, however, if you're hiding passwords or keywords you should enable the option to hide gestures as well.
Are there any elements occluded right out of the box?
iOS
- Occlusion of textfields based on
UITextContentTypeproperty, if the textfield has any ofpassword,creditcardnumber,newpasswordoronetimecodeit will be occluded by default, regardless of if it's shown at some point in the app.
Android:
- Password fields with
android:inputType="textPassword"orInputType.TYPE_TEXT_VARIATION_PASSWORDare occluded.
For Ionic, React Native, and SwiftUI, any text input tagged with uxcam-occlude or <input type="password"> is occluded.
For Flutter, occlusion is not enabled by default and requires a wrapper class to be used.
Jetpack Compose does not support default occlusion right out of the box at the moment.
Password fields in Cordova and web views are also occluded.
Dashboard Occlusion SupportIn order to enable occlusion rules from your dashboard, it is necessary that the SDK has a version equal or above to: iOS v3.6.0, Android v3.6.0, Flutter v2.3.1 and React Native v5.4.6
Additional supported SDKs will be added in these documents once the supported versions release.
Read below for more information on how to take advantage of this feature
Add Occlusions Directly From Your Dashboard:
You can now add occlusion rules to your app directly from your dashboard. Simply go into your app's settings in your dashboard and enable the rules you need, below is a breakdown of how to take full advantage of this feature, without having to resort to adding additional code in your app for most scenarios:
Occlude All Screens from Dashboard
From your app's settings in the UXCam dashboard, you'll see the video recording privacy section, from there, you'll see the first option to either record, occlude or blur all screens in your app.

Blur option will also enable you to select the blur radius (strength) once selected.
Screen Specific Occlusion Rules from Dashboard
You can also customise which screens you want to apply occlusion rules to, and can create multiple rules, for example, blurring a particular screen but occluding others:

Occlude Text Input Fields from Dashboard
You can also choose to occlude all text input fields on a specific or multiple screens by simply checking the option and selecting the screens you'd like to occlude the text inputs in.
IMPORTANT: Flutter does not support text input occlusion, if you want to occlude specific parts of your screens in Flutter, see the Flutter Occlusion Approach page.

Additionally, you can opt to record gestures on all blurred/occluded screens by toggling on the option
Dashboard Occlusion Limitations and Supported SDKs
| UXCam SDK | Supported Version |
|---|---|
| iOS | 3.6.0+ |
| Android | 3.6.0+ |
| Flutter | 2.3.1+ |
| React Native | 5.4.6+ |
Occlusion priority:
- Screen specific overlay from Dashboard
- Screen specific blur from Dashboard
- Global blur/overlay from Dashboard that is applied to all screens
- Screen specific Overlay from SDK
- Screen specific Blur from SDK
- Global blur/overlay from SDK that is applied to all screens
- Global blur/overlay from SDK that has Record exception screens
Limitations:
- Flutter does not support text input occlusion, either from dashboard or code.
- Hiding sensitive Views needs to be handled from code (see here)
Occlusion Setup from SDK Code
If you desire to manually handle occlusions in your app or occlude specific views instead of entire screens, read below for guidance on how to set it up.
Occlude The Entire Screen with Overlay
You can configure different overlay options with the following:
UXCamOverlay overlay = new UXCamOverlay.Builder()
                              .withoutGesture(false)
                              .build();

UXCam.applyOcclusion(overlay); //To apply overlay
UXCam.removeOcclusion(overlay); //To remove overlay
let overlay = UXCamOverlaySetting(color: .yellow)
UXCam.applyOcclusion(overlay)
UXCam.removeOcclusion() // This removes all manual occlusion
UXCam.removeOcclusion(of: .overlay) // This removes manual occlusion of type overlayimport 'package:flutter_uxcam/uxoverlay.dart'; //Import this for Overlay
FlutterUXOverlay overlay = FlutterUXOverlay(
color: Colors.red,
hideGestures: true // optional, default true
);
FlutterUxcam.applyOcclusion(overlay); //To apply overlay
FlutterUxcam.removeOcclusion(overlay); //To remove overlayimport { UXCamOcclusionType } from 'react-native-ux-cam/UXCamOcclusion';
// IF USING SDK VERSION 6.0.0 PLEASE USE:
// import { OcclusionType } from 'react-native-ux-cam/src/types';
const overlay = {
type: UXCamOcclusionType.Overlay, // compulsory to determine overlay type
color: 0xff00ee, // hex integers in 0xrrggbb format
hideGestures: true, // optional, default true
screens: ["screen1", "screen2"] // optional, default all screens
}
RNUxcam.applyOcclusion(overlay); // apply overlay
RNUxcam.removeOcclusion(overlay); // remove overlaylet overlay = OverlaySetting()
// To apply at any point without considering screen
UXCamCore.applyOcclusion(overlay)
// To stop the occlusion that was applied before
UXCamCore.removeOcclusion()UXCamOverlaySetting overlay = new UXCamOverlaySetting (UIColor.Yellow);
UXCam.applyOcclusion(overlay); // apply overlay
UXCam.removeOcclusion(overlay); // remove overlay
const overlay = {
  type: UXCamOcclusionType.Overlay, // compulsory to determine overlay type
  color: 0xff00ee, // hex integers in 0xrrggbb format
  hideGestures: true, // optional, default true
  screens: ["screen1", "screen2"] // optional, default all screens
}
UXCam.applyOcclusion(overlay) // apply overlay
UXCam.removeOcclusion(overlay) // remove overlay
Available overlay options are:
withoutGesture(boolean withoutGesture) || hideGestures(boolean hideGestures)
Allows the user to configure wether to capture gesture in the occluded screen or not. Passing in false to this method tells the SDK to capture gestures. Default is true, so by default the gestures are not captured.
screens(List screens) - Use it in the configuration object
Allows you to define the screens where the overlay is to either be applied or not, depending on the value passed to excludeMentionedScreens(boolean excludeMentionedScreens).
By default, if no screens are passed, the overlay is applied to all the screens unless explicitly removed. This acts as a global setting and will override all other occlusion settings defined for all screens. The occlusion must be removed to revert this action.
If screens are passed, you have the ability to either apply overlay on the mentioned screens or to exclude the mentioned screens from being overlayed.
excludeMentionedScreens(boolean excludeMentionedScreens)
This option should be used in conjunction with screens(List screens).
If the passed in value is true, it tells the SDK to exclude the mentioned screens from occlusion, while applying the occlusion to the rest of the screens in the app.
If the passed in value is false, it tells the SDK to apply occlusion only to the screens that have been passed.
Default value is false.

You'll see the desired screen completely hidden while your users navigate through it.
Blur The Entire Screen
Blur is a new occlusion API that allows you to blur screen records of screens. This lets you obtain information regarding the state of the screen and user interaction, while also maintaining privacy in sensitive screens.
This is useful to set all the occlusion/Blur from one place of the application without having to set it individually in different screens.
You can configure different options using the following:
UXCamBlur blur = new UXCamBlur.Builder().build();

//Example
UXCamBlur blur = new UXCamBlur.Builder()
                      .blurRadius(10) //default 20
                      .withoutGesture(false)
                      .build();

UXCam.applyOcclusion(blur); //To apply the Blurring
let blurSetting = UXCamBlurSetting(radius: 5)
UXCam.applyOcclusion(blurSetting)
UXCam.removeOcclusion() // This removes all manual occlusion
UXCam.removeOcclusion(of: .blur) // This removes manual occlusion of type blur//Import this on the screen you are trying to Blur
import 'package:flutter_uxcam/uxblur.dart';
FlutterUXBlur blur = FlutterUXBlur(
blurRadius: 10,
blurType: BlurType.gaussian,
hideGestures: true // optional, default true
);
FlutterUxcam.applyOcclusion(blur); //To apply blur
FlutterUxcam.removeOcclusion(blur); //To remove blurimport { UXCamOcclusionType } from 'react-native-ux-cam/UXCamOcclusion';
// IF USING SDK VERSION 6.0.0 PLEASE USE:
// import { OcclusionType } from 'react-native-ux-cam/src/types';
const blur = {
type: UXCamOcclusionType.Blur, // compulsory to determine blur type
blurRadius: 20, // optional default 10
hideGestures: true, // optional, default true
screens: ["screen1", "screen2"] // optional, default all screens
}
RNUxcam.applyOcclusion(blur); // apply blur
RNUxcam.removeOcclusion(blur); // remove blurlet blur = BlurSetting()
// To apply at any point without considering screen
UXCamCore.applyOcclusion(blur)
// To stop the occlusion that was applied before
UXCamCore.removeOcclusion()UXCamBlurSetting blur = new UXCamBlurSetting (10);
UXCam.applyOcclusion(blur); // apply blur
UXCam.removeOcclusion(blur); // remove blurconst blur = {
type: 3,
blurRadius: 20, // optional default 10
hideGestures: true, // optional, default true
screens: ["screen1", "screen2"] // optional, default all screens
}
UXCam.applyOcclusion(blur) // apply overlay
UXCam.removeOcclusion(blur) // remove overlayAvailable blur options are:
blurRadius(int blurRadius)
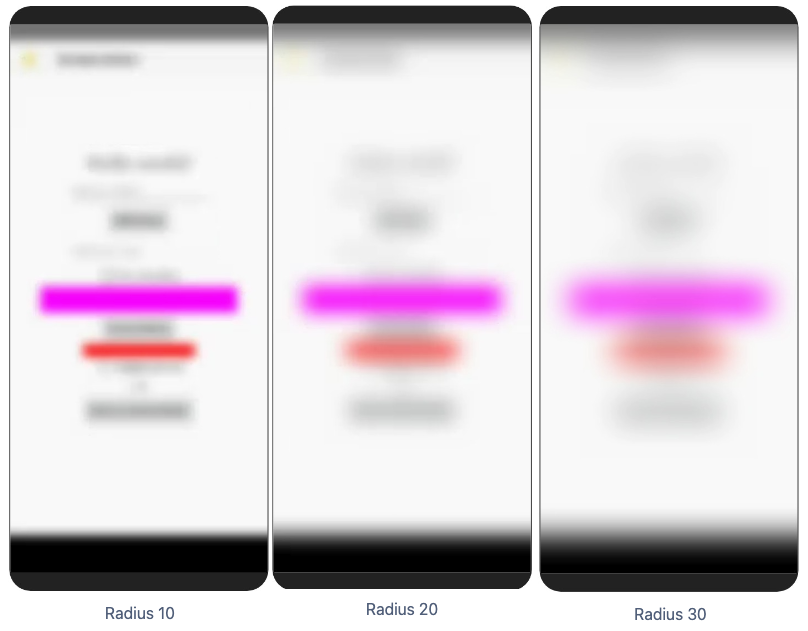
This option allows you to define the blur radius to be used for blurring. The higher the value, the more blurred the resulting video is going to be.
withoutGesture(boolean withoutGesture) || hideGestures(boolean hideGestures)
Same as overlay. Please refer to overlay section.
screens(List screens) - Use it in the configuration object
Same as overlay. Please refer to overlay section.
excludeMentionedScreens(boolean excludeMentionedScreens)
Same as overlay. Please refer to overlay section.

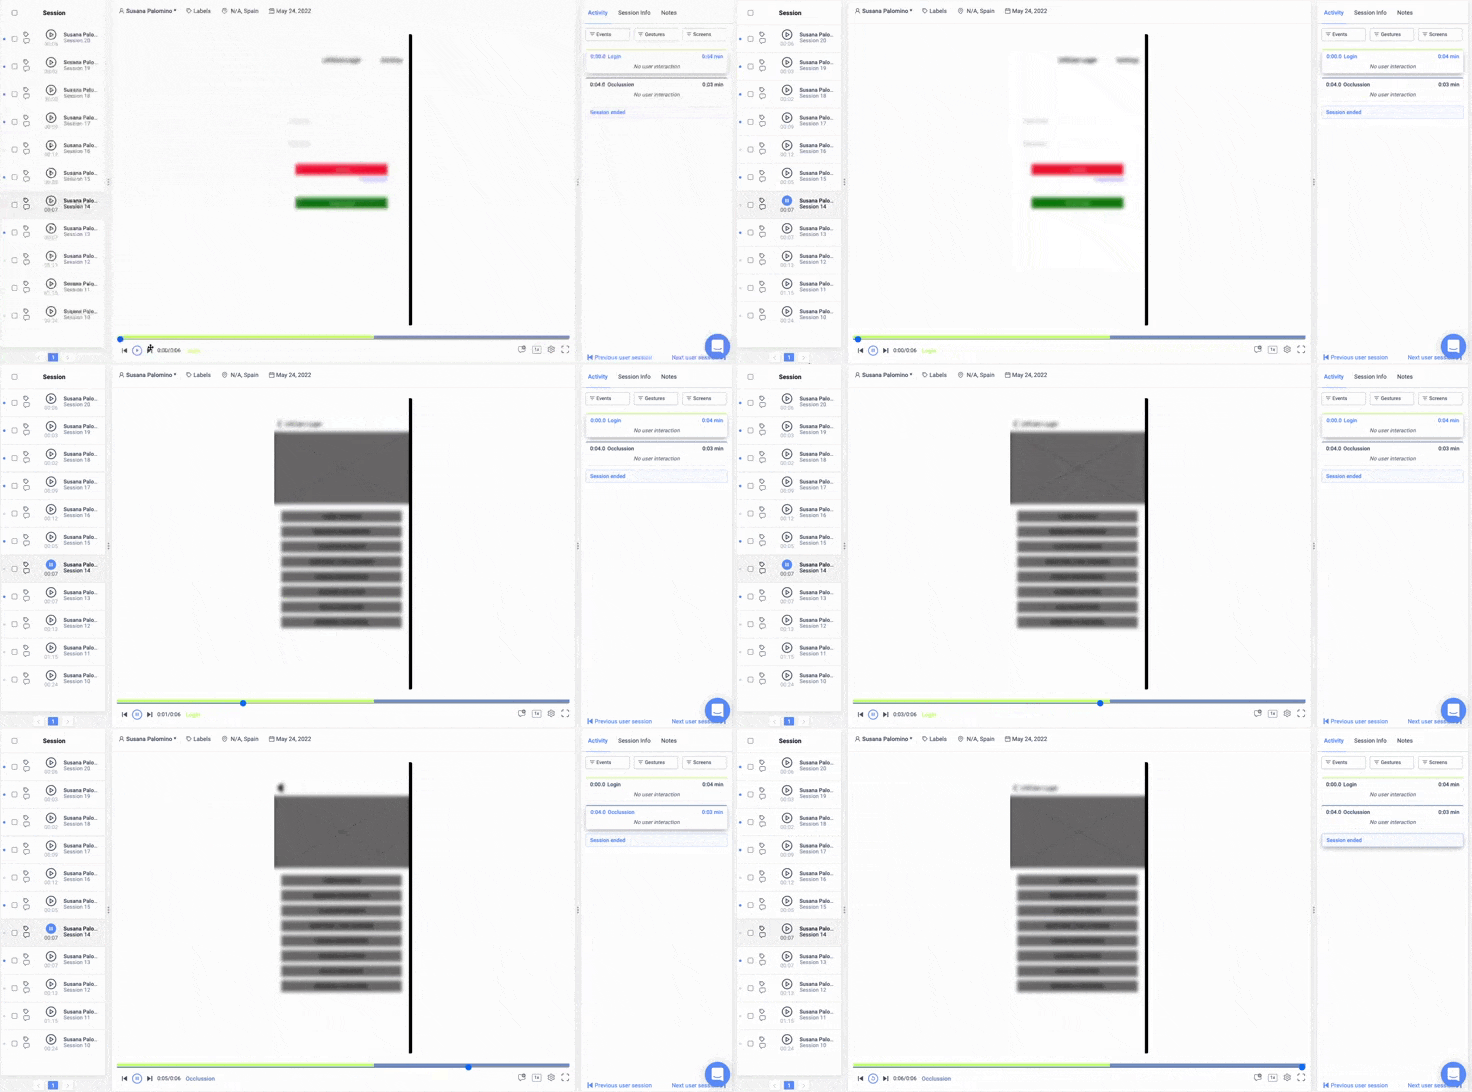
You'll see your desired screens with a blur on top.
Examples on blur radius property customization:

Blur radius customization examples
Occlude all Text Fields
Similar to the new Overlay and Blur APIs:
//Create the object
UXCamOccludeAllTextFields occludeFields = new UXCamOccludeAllTextFields();

UXCam.applyOcclusion(occludeFields); //To apply occlusion
UXCam.removeOcclusion(occludeFields); //To remove the occlusion
let hideTextfields = UXCamOccludeAllTextFields()
UXCam.applyOcclusion(hideTextfields) //To apply occlusion
UXCam.removeOcclusion() //This removes all manual occlusion
UXCam.removeOcclusion(of: .occludeAllTextFields) // This removes manual occlusion of type occlude text fieldsNot supportedimport { UXCamOcclusionType } from 'react-native-ux-cam/UXCamOcclusion';
// IF USING SDK VERSION 6.0.0 PLEASE USE:
// import { OcclusionType } from 'react-native-ux-cam/src/types';
const hideTextFields = {
type: UXCamOcclusionType.OccludeAllTextFields,
screens: ["screen1", "screen2"] // optional, default all screens
}
RNUxcam.applyOcclusion(hideTextFields); // apply hide text fields
RNUxcam.removeOcclusion(hideTextFields); // remove hide text fields
// IMPORTANT: Please keep in mind that this API will only hide <TextInput>
// components. If you wish to hide <Text> components, refer to hiding Views.let hide = OccludeAllTextFields()
// To apply at any point without considering screen
UXCamCore.applyOcclusion(hide)
// To stop the occlusion that was applied before
UXCamCore.removeOcclusion()UXCamOccludeAllTextFields hideTextFields = new UXCamOccludeAllTextFields ();
UXCam.applyOcclusion(hideTextFields); // apply hide text fields
UXCam.removeOcclusion(hideTextFields); // remove hide text fields
All fields identified as text will be occluded.
Hide Sensitive View
Use it to hide specific views with sensitive information that you don't want to record.
The API parameters are:
sensitiveView: A View object that contains sensitive information.
UXCam.occludeSensitiveView(_ sensitiveView: UIView)UXCam.occludeSensitiveView(View sensitiveView);RNUxcam.occludeSensitiveView: (sensitiveView: any) => void
//Example
<Button ref= {view => RNUxcam.occludeSensitiveView(view)}/>const OccludeWrapper(
child:
// Here goes your widget that you want to occlude
),
//Example
const OccludeWrapper(
child: Text(
'Sensitive data that will be occluded by the Wrapper',
),
),uxcamOcclude() -> some View
//eg.
var body: some View
{
VStack
{
Text("Personal data: XYZ")
.uxcamOcclude()
Text("Personal data: Gestures seen")
.uxcamOcclude(blockGestures: false)
}
}void UXCam.OccludeSensitiveView(View sensitiveView)You can occlude sensitive elements in your app by adding uxcam-occlude as your element class name.
// Example
<label for="email">Email:</label>
<input type="email" id="email" class="uxcam-occlude" name="email">Usage from configuration object
It's also possible to pass a list of occlusions (except Sensitive View) to be applied during configuration. For example:
UXCamBlur blur = new UXCamBlur.Builder()
        .blurRadius(20)
        .screens(Arrays.asList("ActivitySecret", "LoginActivity"))
        .build();

UXCamOverlay overlay = new UXCamOverlay.Builder()
        .screens(Arrays.asList("PaymentActivity", "ProfileActivity"))
        .build();

UXCamOccludeAllTextFields textFields = new UXCamOccludeAllTextFields.Builder()
        .screens(Arrays.asList("PaymentActivity", "ProfileActivity"))
        .build();

UXConfig config = new UXConfig.Builder(appKey)
        .occlusions(Arrays.asList(blur, overlay, textFields))
        .enableImprovedScreenCapture(true)
        .build();
UXCam.startWithConfiguration(config);
let configuration = UXCamConfiguration(appKey: "YourAppKey")
let blurSetting = UXCamBlurSetting(radius: 5)
let overlay = UXCamOverlaySetting(color: .yellow)
let hideTextfields = UXCamOccludeAllTextFields()
let occlusion = UXCamOcclusion()
blurSetting.hideGestures = false
occlusion.apply(blurSetting, screens: ["LoginViewController"])
occlusion.apply(hideTextfields, screens: ["LoginViewController"])
configuration.occlusion = occlusion
UXCam.optIntoSchematicRecordings()
UXCam.start(with: configuration)import 'package:flutter_uxcam/uxblur.dart'; //Import this for Blurring
import 'package:flutter_uxcam/uxoverlay.dart'; //Import this for Overlay
FlutterUXBlur blur = FlutterUXBlur(
blurRadius: 10,
blurType: BlurType.gaussian,
hideGestures: true,
screens: ["LoginScreen", "PaymentScreen"]
);
FlutterUXOverlay overlay = FlutterUXOverlay(
color: Colors.red,
hideGestures: true,
screens: ["LoginScreen", "PaymentScreen"]
);
FlutterUxConfig config = FlutterUxConfig(
userAppKey: "UXCAM_APP_KEY",
occlusions: [blur] // can contain blur and overlay
);
FlutterUxcam.startWithConfiguration(config);import { UXCamOcclusionType } from 'react-native-ux-cam/UXCamOcclusion';
// IF USING SDK VERSION 6.0.0 PLEASE USE:
// import { OcclusionType } from 'react-native-ux-cam/src/types';
const blur = {
type: UXCamOcclusionType.Blur, // compulsory to determine blur type
blurRadius: 20, // optional default 10
hideGestures: true, // optional, default true
screens: ["screen1", "screen2"] // optional, default all screens
}
const overlay = {
type: UXCamOcclusionType.Overlay, // compulsory to determine blur type
color: 0xff00ee, // hex integers in 0xrrggbb format
hideGestures: true, // optional, default true
screens: ["screen1", "screen2"] // optional, default all screens
}
const textFields = {
type: UXCamOcclusionType.OccludeAllTextFields, // compulsory to determine blur type
screens: ["screen1", "screen2"] // optional, default all screens
}
const configuration = {
userAppKey: 'YOUR UXCAM API KEY GOES HERE',
occlusions: [overlay, blur, textFields]
}
RNUxcam.startWithConfiguration(configuration);//Please make sure that you have tagged your screens in SwiftUI
let blur = BlurSetting(radius: 5)
let occlusion = Occlusion()
let config = Configuration(appKey: "USER-API-KEY")
occlusion.apply(blur, screens: ["Item Detail Page"])
config.occlusion = occlusion
UXCamSwiftUI.start(with: config)UXCamBlurSetting blur = new UXCamBlurSetting (10);
UXCamConfiguration configuration = new UXCamConfiguration('User Api Key');
configuration.Occlusion = new UXCamOcclusion(blur);
UXCam.startWithConfiguration(configuration);const blur = {
type: 3,
blurRadius: 20, // optional default 10
hideGestures: true, // optional, default true
screens: ["screen1", "screen2"] // optional, default all screens
}
const configuration = {
userAppKey: 'YOUR API KEY',
enableMultiSessionRecord: true,
enableCrashHandling: true,
enableAutomaticScreenNameTagging: false,
enableImprovedScreenCapture: true,
occlusions: [blur]
}
UXCam.startWithConfiguration(configuration);Occlusion In Previous SDK Versions
Outdated SDK occlusionFor older SDK versions, please refer to the below occlusion methods.
Note: outdated SDKs do not support the blurring feature.
important: It is highly recommended to upgrade your SDK as soon as possible.
Hide Sensitive Screen
The API parameters are:
occlude: Set TRUE to hide the screen from the recording, FALSE to start recording the screen contents again.
void UXCam.OccludeSensitiveScreen(bool occlude)UXCam.occludeSensitiveScreen: (occlude: boolean) => voidHide All TextFields
The API parameters are:
occludeAll: Set TRUE to hide all TextFields in the recording, FALSE to stop occluding them from the screen recording.
void UXCam.occludeAllTextFields(bool occludeAll)UXCam.occludeAllTextFields: (occludeAll: boolean) => voidHide Sensitive View
Please refer to the above steps for sensitive views hiding.
Updated 10 months ago

