Android SDK Integration Guide
How to Get Started with UXCam for Android
Note
Highlights information that users should take into account, even when skimming.
Tip
Optional information to help a user be more successful.
Important
Crucial information necessary for users to succeed.
Warning
Critical content demanding immediate user attention due to potential risks.
Caution
Negative potential consequences of an action.
Success
Negative potential consequences of an action.
Integration Journey at a Glance
- Customize SDK Configuration — Capture your first live session.
- Tag Screens — Enable heat-maps & screen analytics.
- Mask Sensitive Data — Hide passwords and other GDPR/CCPA data.
- Identify Users & Set Properties — Unify sessions, power funnels & cohorts.
- Track Custom Events — Measure key actions & run final QA.
Note
Highlights information that users should take into account, even when skimming.
Tip
Optional information to help a user be more successful.
Important
Crucial information necessary for users to succeed.
Warning
Critical content demanding immediate user attention due to potential risks.
Caution
Negative potential consequences of an action.
Success
Negative potential consequences of an action.
Key Benefits After Setup
- Session Replay + Heatmaps – Watch every user experience moment in full context.
- Advanced Product Analytics – funnels, retention, feature adoption.
- Insight Alerts – journey summaries, rage-tap & anomaly detection.
- Engineering Analytics – Connect client-side performance to real sessions. Monitor crashes, ANRs, and handled exceptions with session replay and developer logs for faster debugging.
Tips Before You Begin
- Create separate keys for debug & production to keep data clean.
- Use feature flags to toggle UXCam in staging builds.
- Check Logcat for “Verification successful” and “Session/Video uploaded” messages to confirm the integration is working correctly.
Android SDK · Quickstart
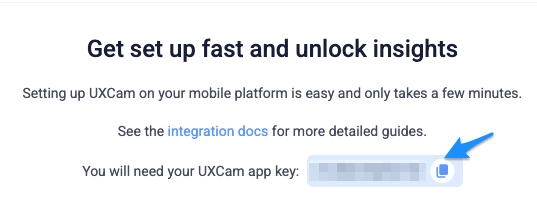
Step 1: Get your App Key
1.1: Find your app key
If you don't already have it, find it in App Settings -> App Key on your UXCam Dashboard.
Note
Highlights information that users should take into account, even when skimming.
Tip
Optional information to help a user be more successful.
Important
Crucial information necessary for users to succeed.
Warning
Critical content demanding immediate user attention due to potential risks.
Caution
Negative potential consequences of an action.
Success
Negative potential consequences of an action.
1.2: Keep it out of source control:
add it to local.properties (already in the default .gitignore) or inject it via your CI, then expose it safely at compile-time and avoid hard-coding secrets in your codebase.
Step 2: Add the SDK Dependency
In your module's build.gradle, add:
repositories {
  maven { url 'https://sdk.uxcam.com/android/' }
}
dependencies {
  implementation 'com.uxcam:uxcam:3.+'
}
Step 3: Start Recording
From your Application Class or Launcher Activity, add the configuration and start the SDK.
Note
Highlights information that users should take into account, even when skimming.
Tip
Optional information to help a user be more successful.
Important
Crucial information necessary for users to succeed.
Warning
Critical content demanding immediate user attention due to potential risks.
Caution
Negative potential consequences of an action.
Success
Negative potential consequences of an action.
import com.uxcam.UXCam
import com.uxcam.datamodel.UXConfig

class MyApp : Application() {
  override fun onCreate() {
    super.onCreate()
    val config = UXConfig.Builder(YOUR_UXCAM_KEY).build()
    UXCam.startWithConfiguration(config)
}
import com.uxcam.UXCam;
import com.uxcam.datamodel.UXConfig;
public class MyApp extends Application {
@Override
public void onCreate() {
super.onCreate();
UXConfig config = new UXConfig.Builder(YOUR_UXCAM_KEY).build();
UXCam.startWithConfiguration(config);
}
}Note
Highlights information that users should take into account, even when skimming.
Tip
Optional information to help a user be more successful.
Important
Crucial information necessary for users to succeed.
Warning
Critical content demanding immediate user attention due to potential risks.
Caution
Negative potential consequences of an action.
Success
Negative potential consequences of an action.
Advanced SDK Configuration
You can control how the SDK is configured via the configuration object you create, the available parameters are below:
Enable Debug Logs?
Set our configuration option .enableIntegrationLogging(bool) as true to see detailed UXCam logs in Logcat. This is useful for verifying your setup and troubleshooting any issues.
Other Configuration Options
.enableAutomaticScreenNameTagging(bool)True by Default. Set to false if you want to disable automatic screen tagging..occlusions(Arrays.asList(occlusion))For passing occlusion for screens from the SDK startup, we'll get to that here..enableCrashHandling(bool)True by Default. Set to false if you want to disable crash capture..enableMultiSessionRecord(bool)True by Default. Set to false to stop any session after the first one from being recorded.
Video Tutorial
Next Steps
You've successfully integrated UXCam and sent some sessions, great job! But there's so much more you can do. Now, let's go further into setting things up.
Take full advantage of heatmaps and screen analytics.
Review Automatic or Manual Tagging
Protect your users’ privacy by masking sensitive data.
Mask or Blur Screens, Views and Fields
Get the full picture with user-level analytics.
Assign Custom User IDs and Properties
Gain deeper insights into your users' interactions.
Send Events and Add Properties
Updated 21 days ago