Shopify
Integrate the UXCam Web SDK into your Shopify site and track custom events using Liquid tags by following the steps below. Liquid tags let you insert Shopify data (like product or customer info) into JavaScript. This ensures events sent to UXCam are relevant and personalised.
Prerequisites
- Active Shopify account with theme editing access
- UXCam App Key (found in UXCam dashboard under Settings > Project Settings)
Step 1: Adding UXCam Web SDK to Shopify
Access the Shopify Theme Editor
- Log in to your Shopify Admin.
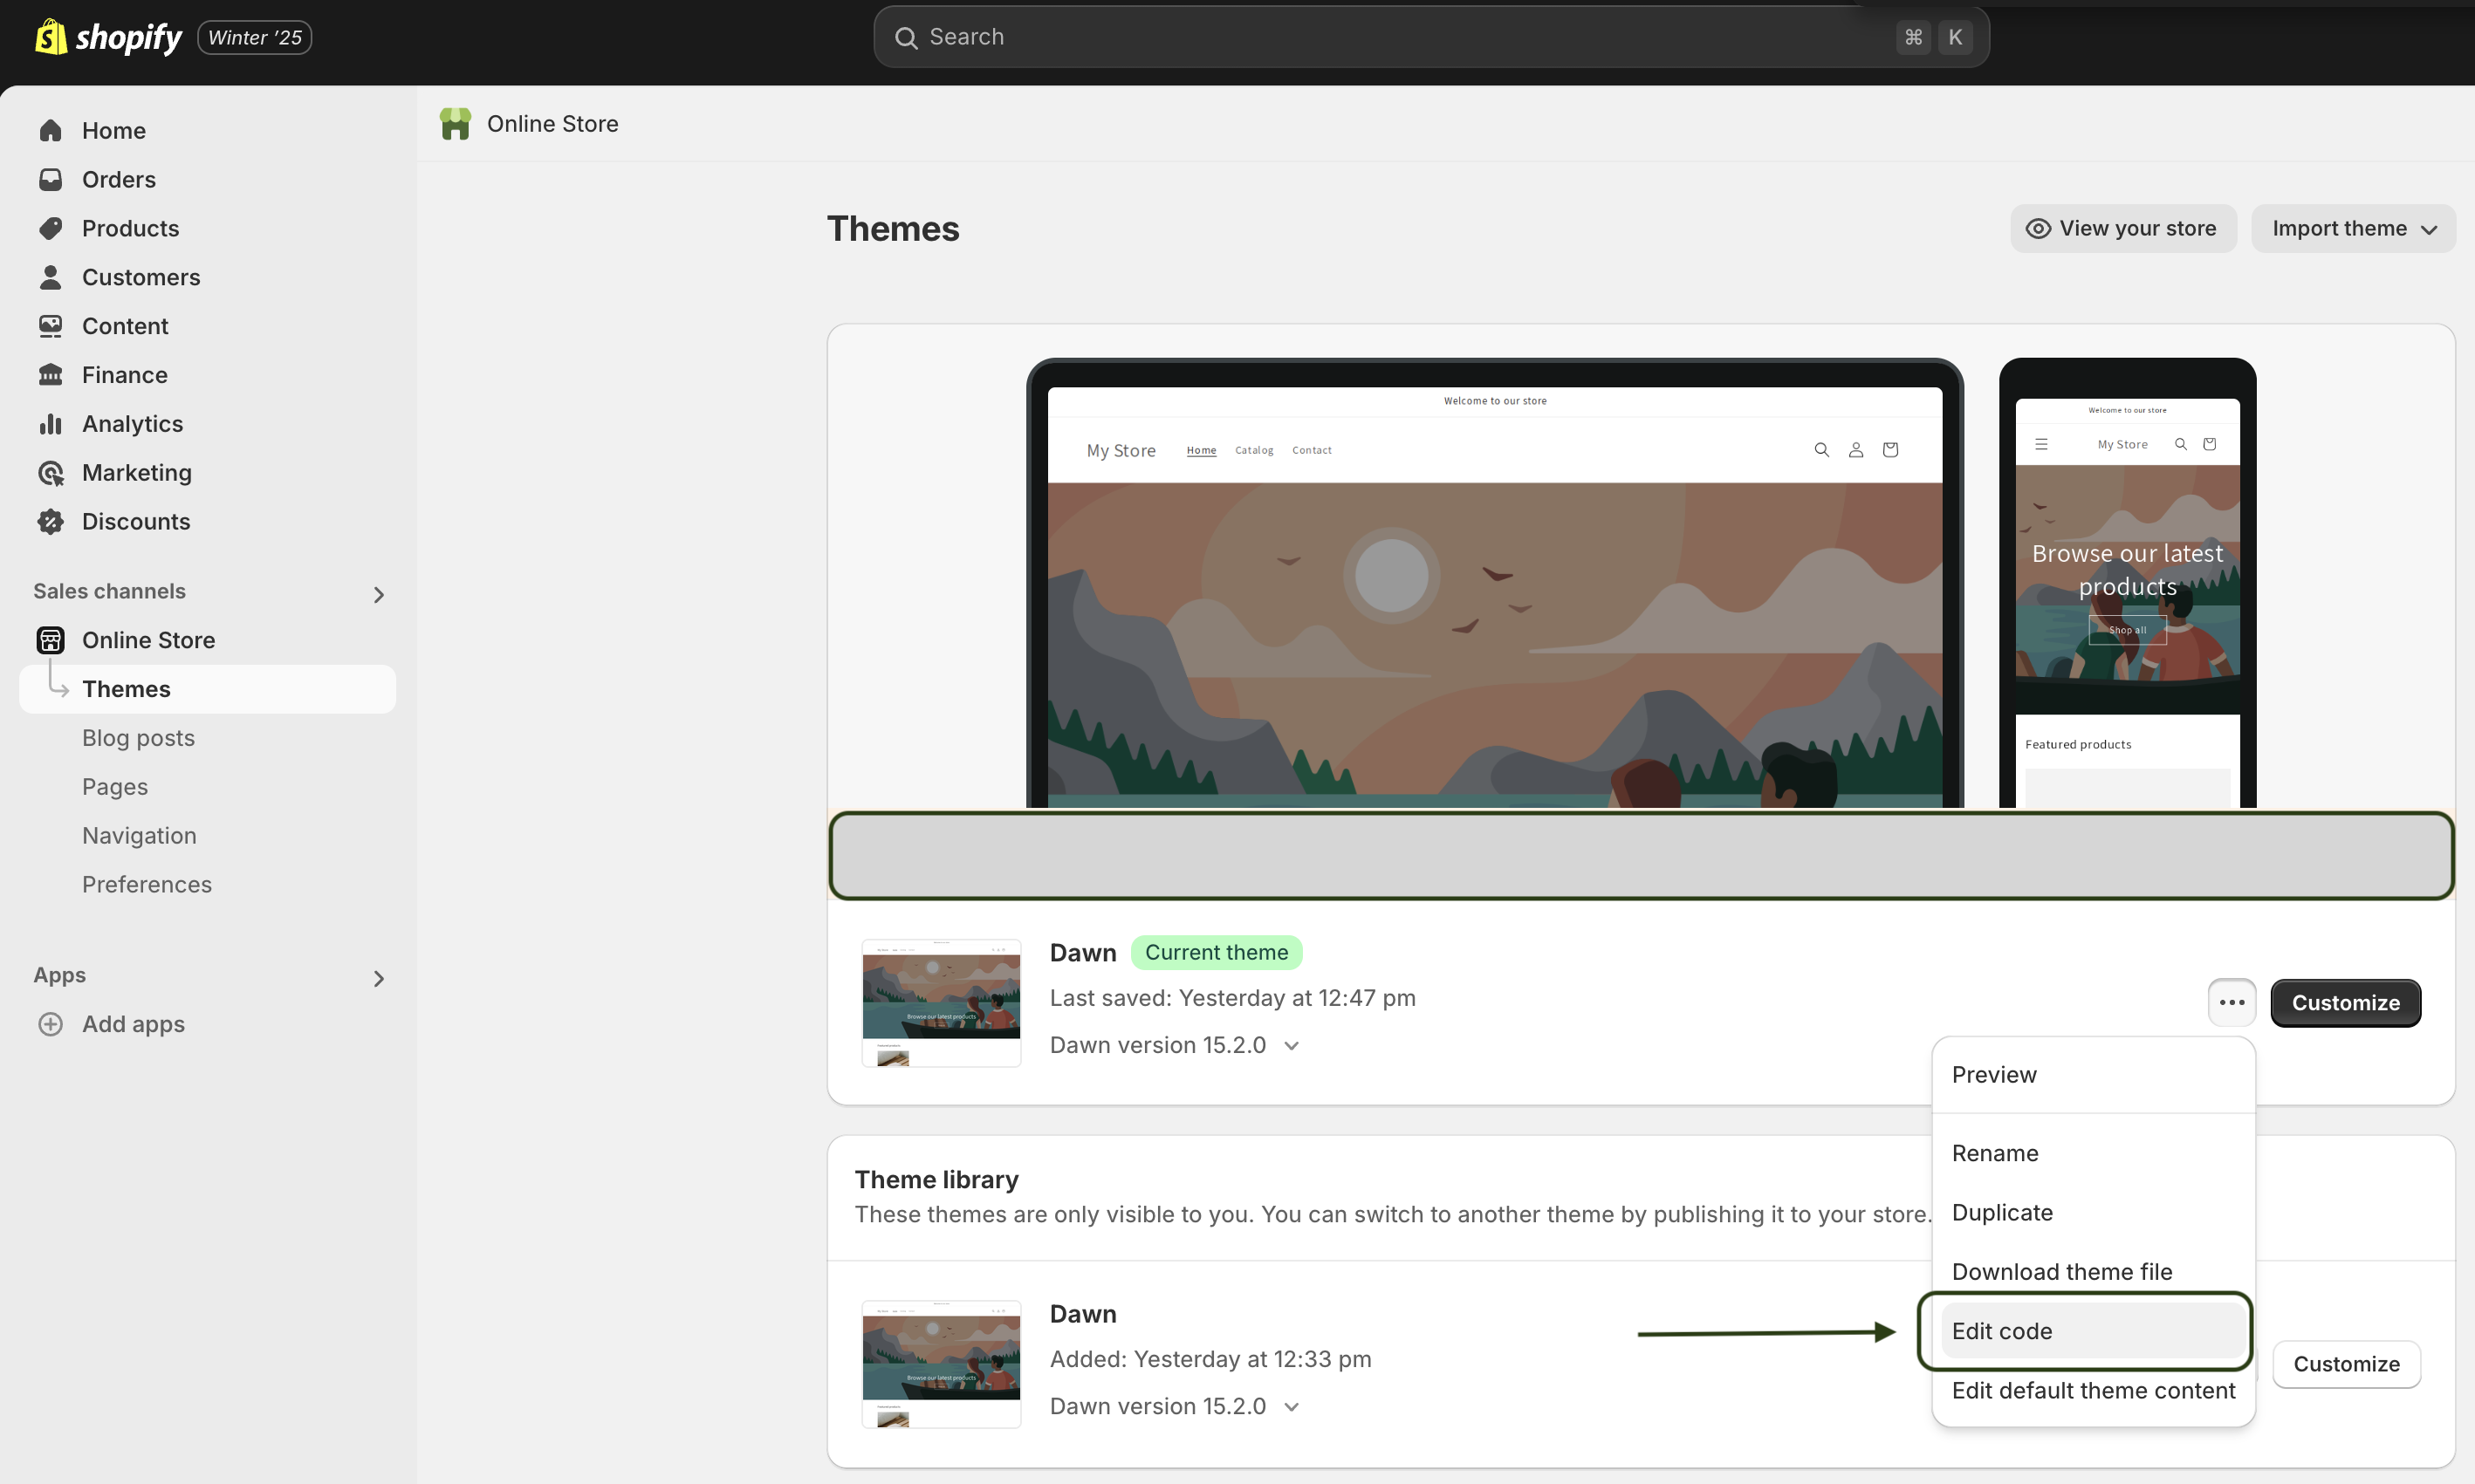
- Go to Online Store > Themes.
- Select your active theme and click Actions > Edit Code.
Add the Web SDK Script
- Replace
'Your_App_Key'in the following HTML code with the App Key from your UXCam platform - Navigate to the Layout folder, locate the theme.liquid file, and add the following script before the closing </head> tag
- Save the changes.
<script type="text/javascript" defer="">
  (function( appKey, opts ) {
    window.uxc = {
      __t: [],
      __ak: appKey,
      __o: opts,
      event: function( n, p ) {
        this.__t.push( [ 'event', n, p ] );
      },
      setUserIdentity: function( i ) {
        this.__t.push( [ 'setUserIdentity', i ] );
      },
      setUserProperty: function( k, v ) {
        this.__t.push( [ 'setUserProperty', k, v ] );
      },
      setUserProperties: function( p ) {
        this.__t.push( [ 'setUserProperties', p ] );
      },
    };
    var head = document.getElementsByTagName('head')[0];
    var script = document.createElement('script');
    script.type = 'text/javascript';
    script.src = '//websdk-recording.uxcam.com/index.js';
    script.async = true;
    script.defer = true;
    script.id = 'uxcam-web-sdk';
    script.crossOrigin = 'anonymous';
    head.appendChild(script);
  } )( 'YOUR_APP_KEY', {} );
</script>
Note
Highlights information that users should take into account, even when skimming.
Tip
Optional information to help a user be more successful.
Important
Crucial information necessary for users to succeed.
Warning
Critical content demanding immediate user attention due to potential risks.
Caution
Negative potential consequences of an action.
Success
Negative potential consequences of an action.
Step 2: Sending Custom Events
To track user interactions across different pages on your Shopify store, use Shopify’s Liquid syntax to conditionally inject JavaScript that triggers UXCam custom events.
Tracking Product Page Views
To send events when users view pages, helps monitor whenever a product page is viewed, including the product's name, ID, and price:
- Open the product.liquid template under the Templates directory.
- Insert a script that sends a custom event using product-specific data, such as:
<script>
  document.addEventListener("DOMContentLoaded", function() {
    uxc.event("Product Viewed", {
      product_name: "{{ product.title }}",
      product_id: "{{ product.id }}"
    });
  });
</script>
Tracking Checkout Interactions
To capture user activity during checkout, helps monitor checkout behaviour, such as total value and number of items:
- Open the checkout.liquid template.
- Add a script to send an event with checkout information:
<script>
  document.addEventListener("DOMContentLoaded", function() {
    uxc.event("Checkout Started", {
      total_price: {{ checkout.total_price | money_without_currency }},
      item_count: {{ checkout.line_items.size }}
    });
  });
</script>
Tracking Page Views Based on Template
To send page view events depending on the type of page, helps to send different events for each page type, making your session recordings and analytics more actionable.
- Open the theme.liquid layout file.
- Add conditional JavaScript based on the current template:
<script>
  document.addEventListener("DOMContentLoaded", function() {
    {% if template == 'index' %}
      uxc.event("Home Page Viewed", {
        page_title: "Home Page"
      });
    {% elsif template == 'product' %}
      uxc.event("Product Page Viewed", {
        product_name: "{{ product.title }}"
      });
    {% elsif template == 'cart' %}
      uxc.event("Cart Viewed", {
        item_count: {{ cart.item_count }}
      });
    {% endif %}
  });
</script>
Step 3: User ID and Properties
Identify Users
To associate session data with known users, you can dynamically set user identity and attributes using Liquid tags. This is especially useful if your Shopify store includes a customer login system. This ensures UXCam sessions are tied to individual users, enabling more precise filtering, retention tracking, and user-level insights.
Setting User Identity and Properties
- In your theme file (e.g., theme.liquid), insert the following script inside the <head> tag.
- Use Liquid conditions to check for a logged-in customer and inject their details:
<script>
  document.addEventListener("DOMContentLoaded", function() {
    {% if customer %}
      uxc.setUserIdentity("{{ customer.id }}");
      uxc.setUserProperties({
        email: "{{ customer.email }}",
        name: "{{ customer.first_name }} {{ customer.last_name }}"
      });
    {% endif %}
  });
</script>
Support
For questions or support, reach out to us at [email protected].
Updated about 1 year ago