Sensitive Views inside Webviews
UXCam provides a convenient way to handle occlusion of sensitive views within a webview by using the uxcam-occlude class. This guide will walk you through the steps to properly implement this approach and ensure sensitive elements are obscured in the captured recordings.
Step 1: Identify Sensitive Views
Before implementing the occlusion approach, you need to identify the HTML elements within the webview that contain sensitive information or should be obscured in UXCam recordings. These elements could include login forms, passwords, personal information fields, or any other sensitive content.
Step 2: Add uxcam-occlude Class
To occlude the sensitive views, you simply need to add the uxcam-occlude class to the corresponding HTML elements. This class will instruct UXCam to automatically obscure these elements in the recorded sessions, maintaining privacy and data protection.
Example:
Let's assume you have a login form with two input fields for username and password. To occlude these fields, modify the HTML code as follows:
<input type="text" class="uxcam-occlude" name="username" placeholder="Username">
<input type="password" class="uxcam-occlude" name="password" placeholder="Password">
In the example above, we added the uxcam-occlude class to both input fields. Now, UXCam will hide these fields in the recorded sessions, ensuring sensitive information remains confidential.
Step 3: Verify Occlusion in Recordings
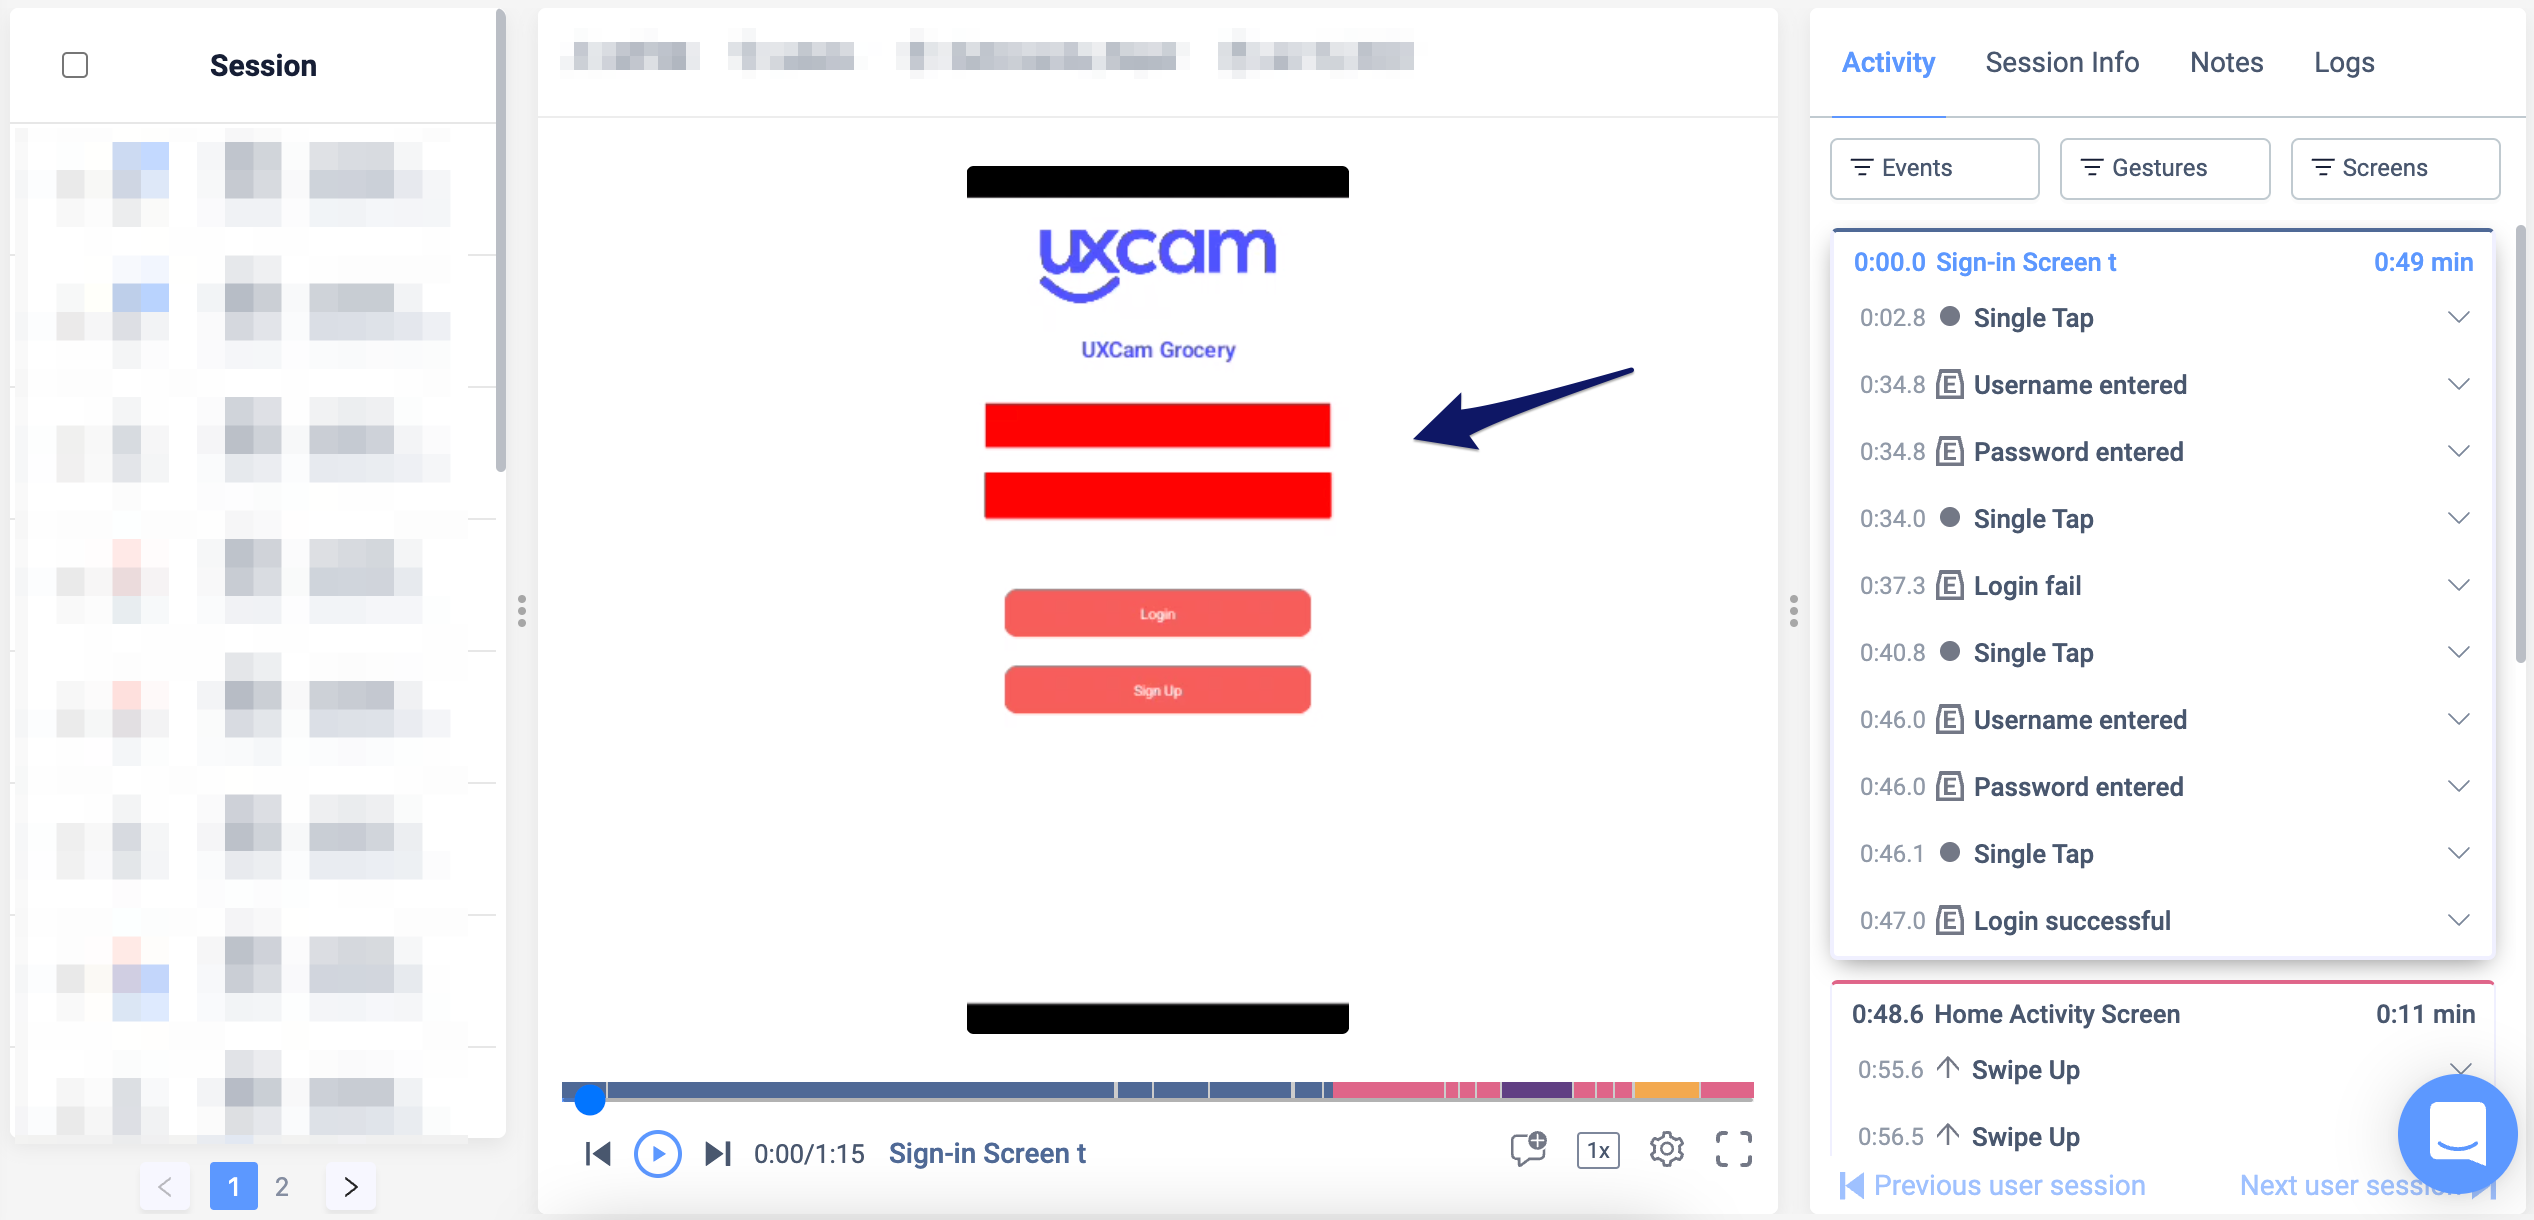
After implementing the uxcam-occlude class in your webview, it's crucial to verify that the occlusion is working as expected. You can do this by recording test sessions and reviewing the recordings.
During the review process, pay close attention to the areas where you applied the uxcam-occlude class. Ensure that the sensitive elements are suitably obscured, demonstrating that the occlusion is functioning correctly.
Step 4: Adjust Occlusion if Necessary
If you notice any issues or inconsistencies in the occlusion, you can make adjustments as needed. This could involve repositioning the occluded elements, modifying their styles, or updating the uxcam-occlude class placement.
Remember to test the updated implementation and review the recordings again to confirm that the occlusion now functions as intended.
By following this guide, you can easily utilize UXCam's
uxcam-occludeclass to handle webview occlusion effectively. Adding the class to sensitive HTML elements ensures their privacy and protection in UXCam recordings, providing a seamless user experience without compromising data security.
Updated 6 months ago