Google Tag Manager
Overview
To use UXCam with Google Tag Manager (GTM), you will need to follow these steps. This will allow you to efficiently manage and deploy the UXCam script across your website.
Step 1: Integrate Google Tag Manager Script
First, you must integrate the Google Tag Manager script into all of your web pages. Follow the instructions provided in the Google Tag Manager documentation to add the GTM script to your website.
Step 2: Adding the UXCam Script via Custom HTML Tag
- Create a New Tag in GTM:
- Log in to your Google Tag Manager account.
- Go to the workspace for the website where you want to integrate UXCam.
- Click on "Tags" in the left-hand menu, then click on "New."
- Configure the Tag:
- Tag Type: Select "Custom HTML."
- HTML Content: Paste the UXCam script into the HTML section, as shown below:
<script type="text/javascript" defer="">
(function(appKey, opts) {
    window.uxc = {
        __t: [],
        __ak: appKey,
        __o: opts,
        event: function(n, p) {
            this.__t.push(['event', n, p]);
        },
        setUserIdentity: function(i) {
            this.__t.push(['setUserIdentity', i]);
        },
        setUserProperty: function(k, v) {
            this.__t.push(['setUserProperty', k, v]);
        },
        setUserProperties: function(p) {
            this.__t.push(['setUserProperties', p]);
        },
    };
    var head = document.getElementsByTagName('head')[0];
    var script = document.createElement('script');
    script.type = 'text/javascript';
    script.src = '//websdk-recording.uxcam.com/index.js';
    script.async = true;
    script.defer = true;
    script.id = 'uxcam-web-sdk';
    script.crossOrigin = 'anonymous';
    head.appendChild(script);
})('yourAppKey', {});
</script>Please note:
Your App Key can be found in the dashboard, for more information you can check here
- Set the Trigger:
- For the UXCam script to run on all pages, configure the trigger as "Page View - All Pages."
- This will ensure that the script is executed whenever a page is viewed on your website.
- Save and Publish:
- After configuring the tag and trigger, save your changes.
- Click "Submit" to publish the changes, making the UXCam script active on your website.
Step 3: Adding UXCam Events with Google Tag Manager
In addition to loading the UXCam script, you can also track specific events using GTM.
- Create a New Tag for Events:
- Go to "Tags" in GTM and click on "New."
- Select "Custom HTML" as the tag type.
- Add Event Script:
- Inside the HTML box, add your UXCam event tracking code. Remember to wrap the code inside
<HTMLBlock>{and}</HTMLBlock>tags. Here is an example where the event is fired when a button with the class submitButton is clicked:
<script>uxc.event("your_amazing_event", { key: "value" }) </script>- Set the Trigger:
- In this case, you want the event to fire when a user clicks a button. Configure the trigger as "Click - All Elements" and add a condition where the "Click Classes" equals submitButton.
- Save and Publish:
- Save your tag configuration and publish the changes.
Additional Information
- Custom Events: You can configure additional events similarly by changing the event name and properties.
- Debugging: Use GTM's Preview mode to test and ensure that your tags are firing correctly before publishing.
Send Events and properties to UXCam through GTM using data layer variables
You can use Google Tag Manager (GTM) to send custom events to UXCam. This includes sending data layer variables as event properties to help you track meaningful user actions with context.
What You'll Need
- A working GTM setup on your website
- UXCam already integrated using the HTML tag method in GTM
👉 View Integration Guide above - Access to edit your website’s code and GTM container
(If you’re reusing triggers and variables that already exist on your GTM account, you don’t need access to your website code)
Note: If you’ve already set up the Data layer variables in GTM, skip to step 3.
Step 1: Push Data to the Data Layer
On your website, push values to the GTM data layer when a user action happens.
dataLayer.push({'variable_name': 'variable_value'})Example:
window.dataLayer = window.dataLayer || [];
window.dataLayer.push({
  event: 'AddToCart',
  Item: 'Shoes',
  ItemPrice: 49.99
});
Where:
event: The name used to trigger your tag in GTM (e.g., ‘AddToCart)
Item, ItemPrice: Values you want to send as event properties
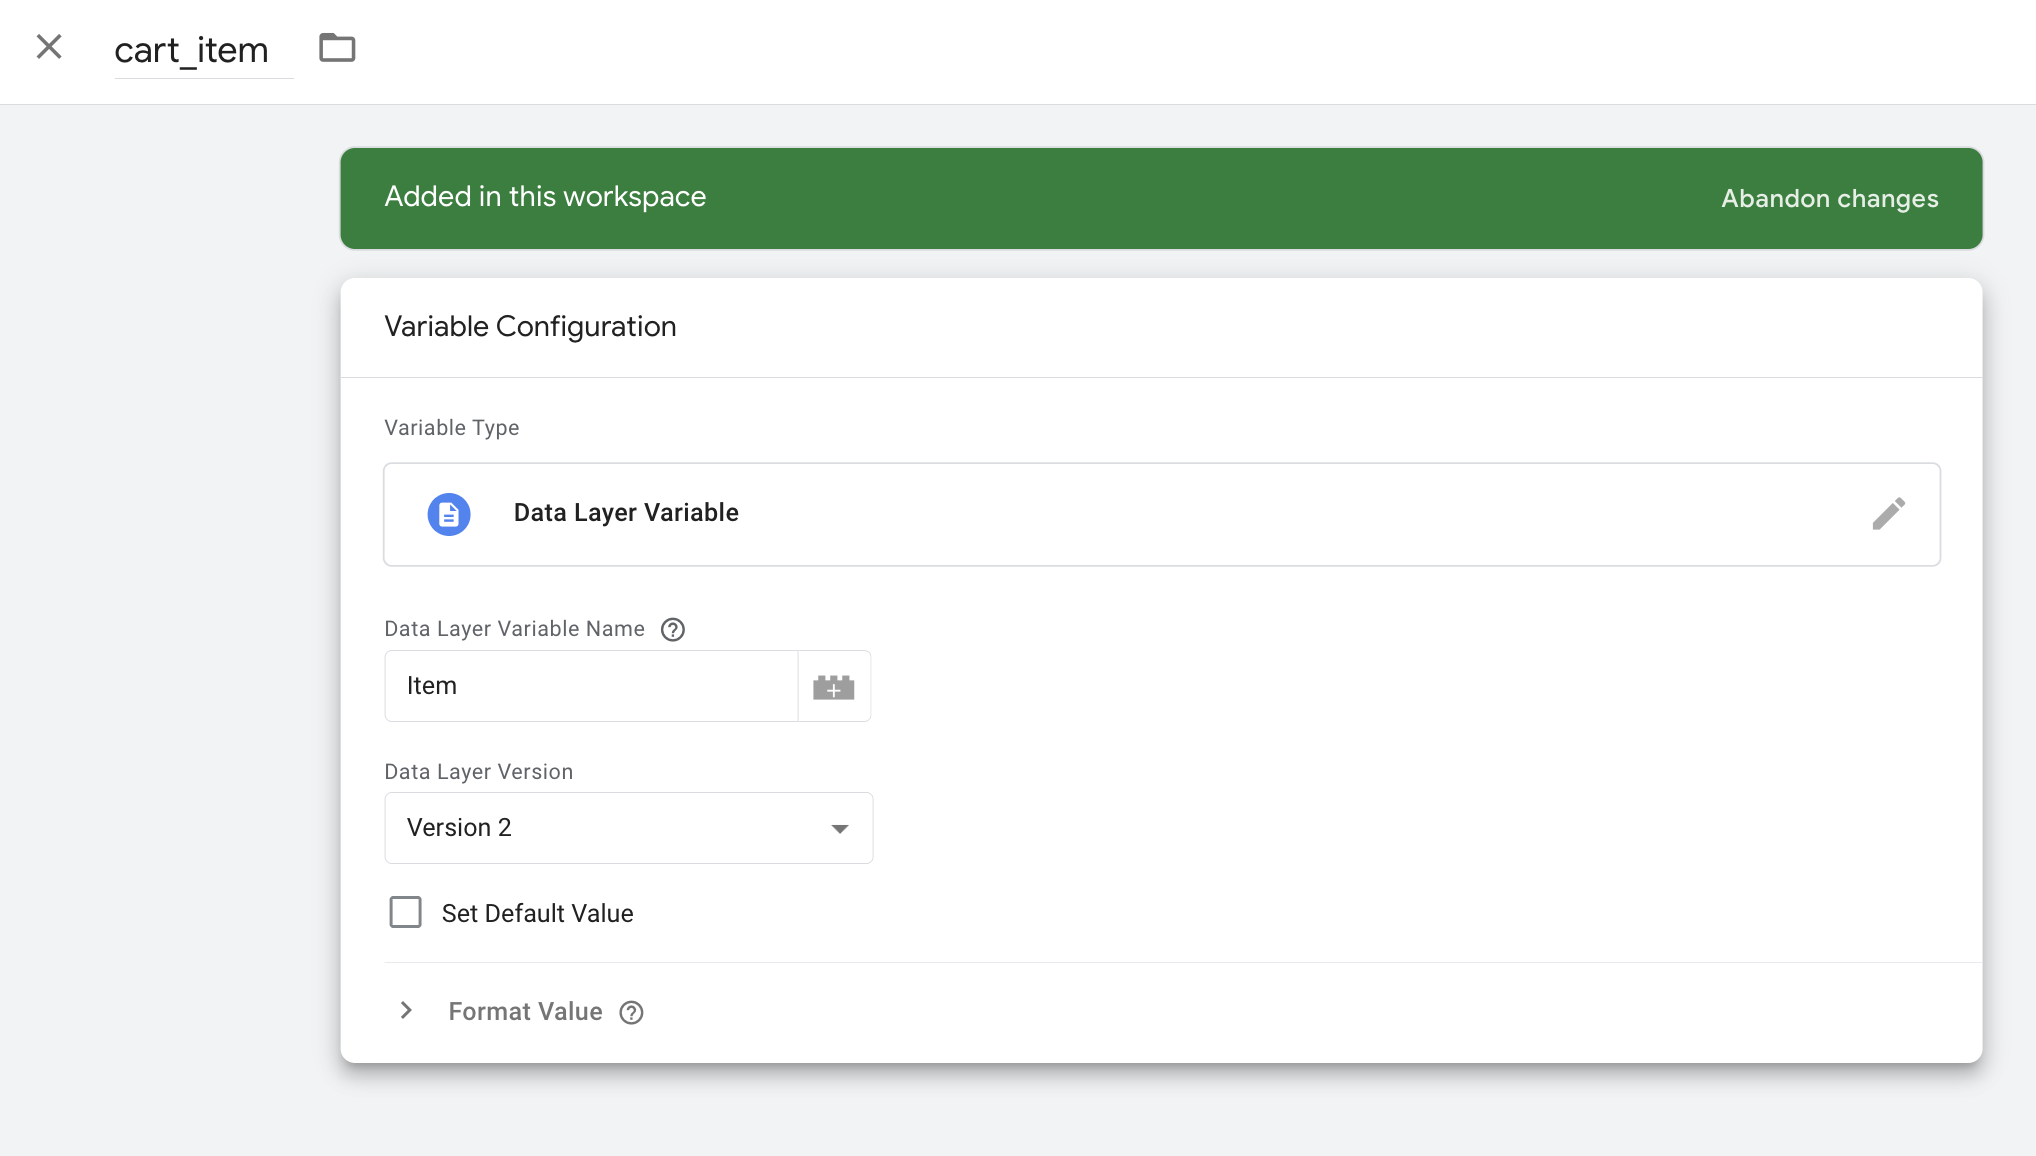
Step 2: Define Variables in GTM
- In GTM, go to Variables → User-Defined Variables
- Click New, and select Data Layer Variable
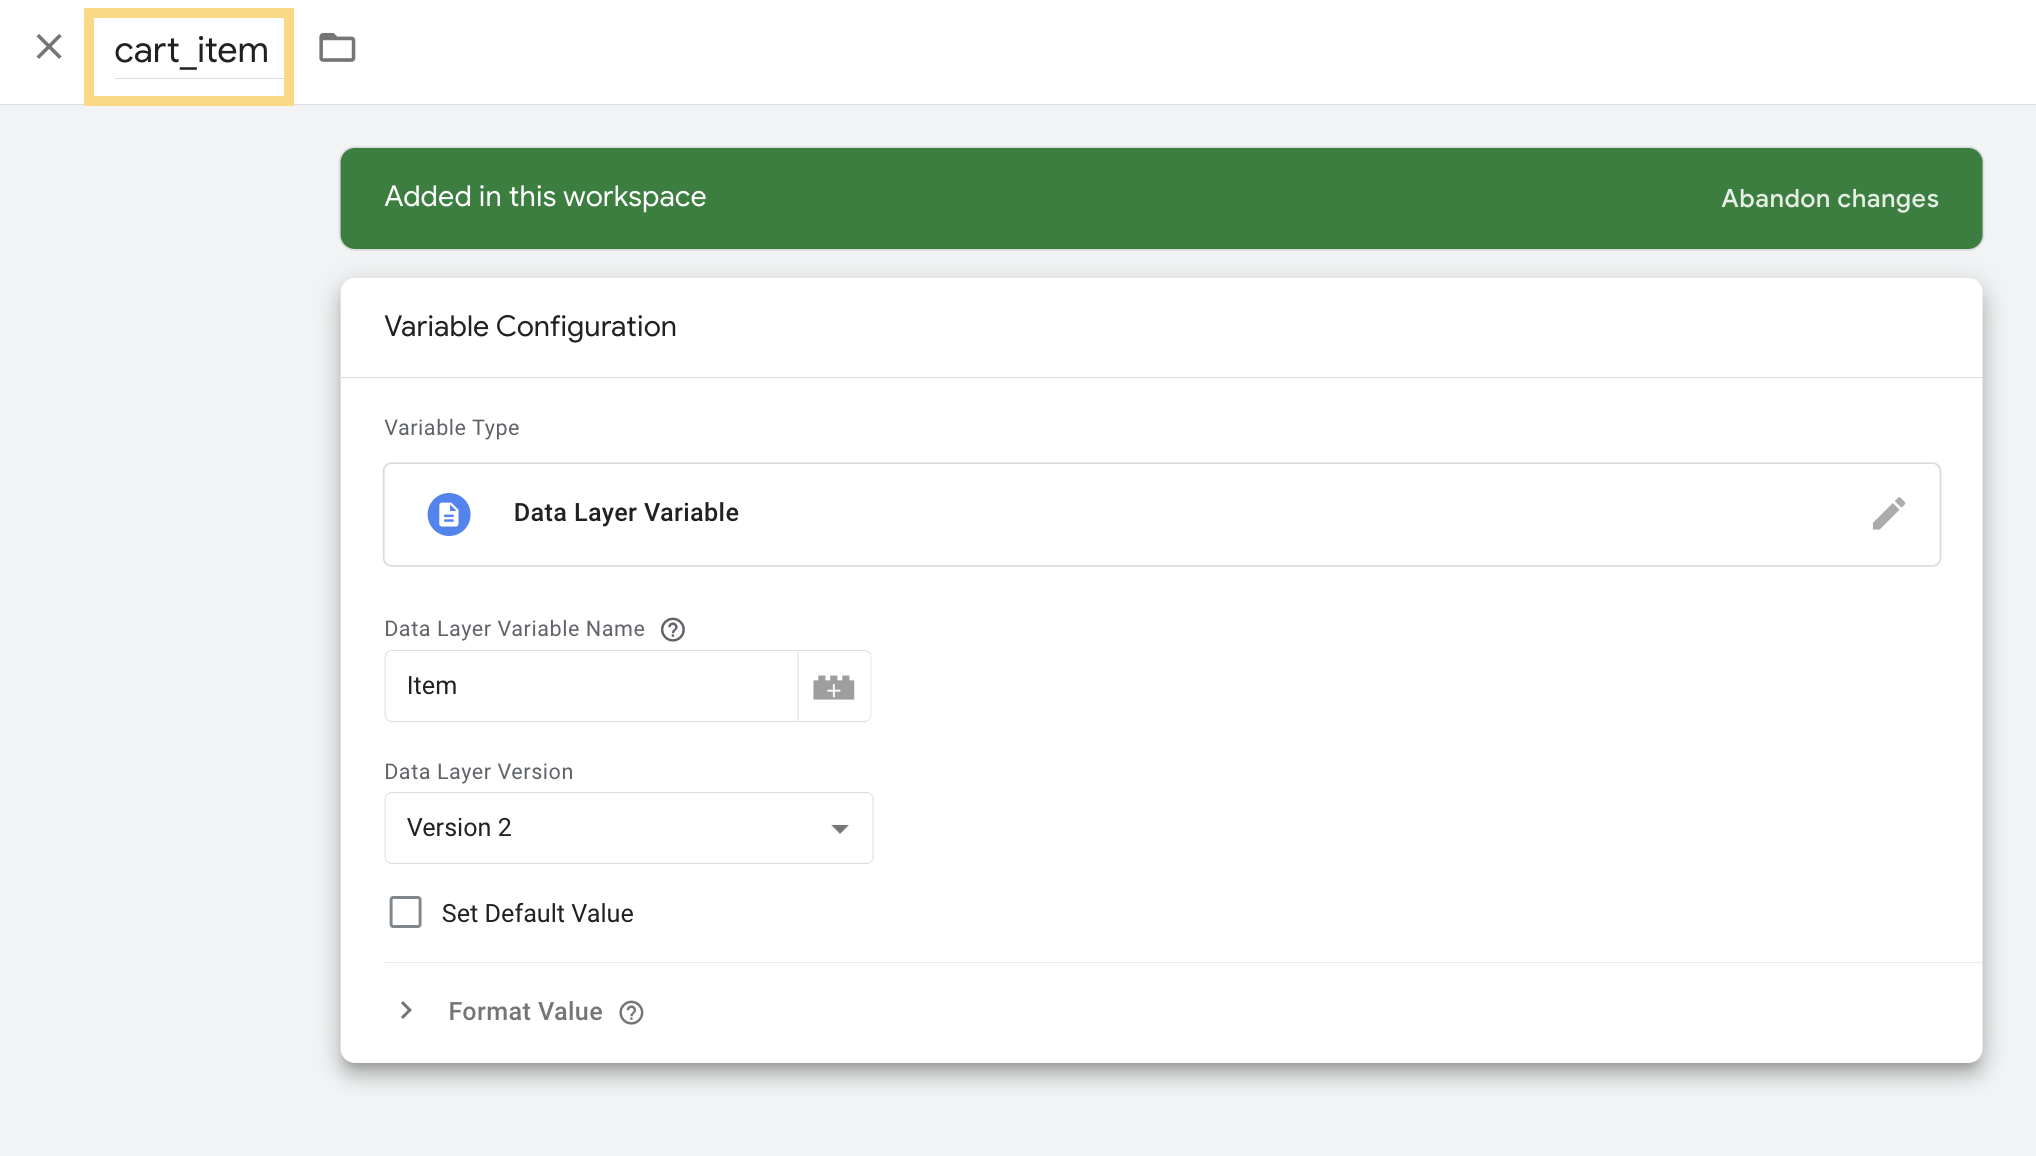
- Name your Variable (top-left) - (e.g. cart_item)
- Set the Data Layer Variable Name to match the key in the dataLayer.push (e.g., Item, ItemPrice)
- Repeat this for each data layer value you want to use
💡 Tip: Give your GTM variables clear names to stay organized.
Read more about GTM variables here.
Step 3: Create the UXCam Event Tag
Go to Tags → New → Choose Custom HTML
Paste the following code, adjusting the event name and variable names:
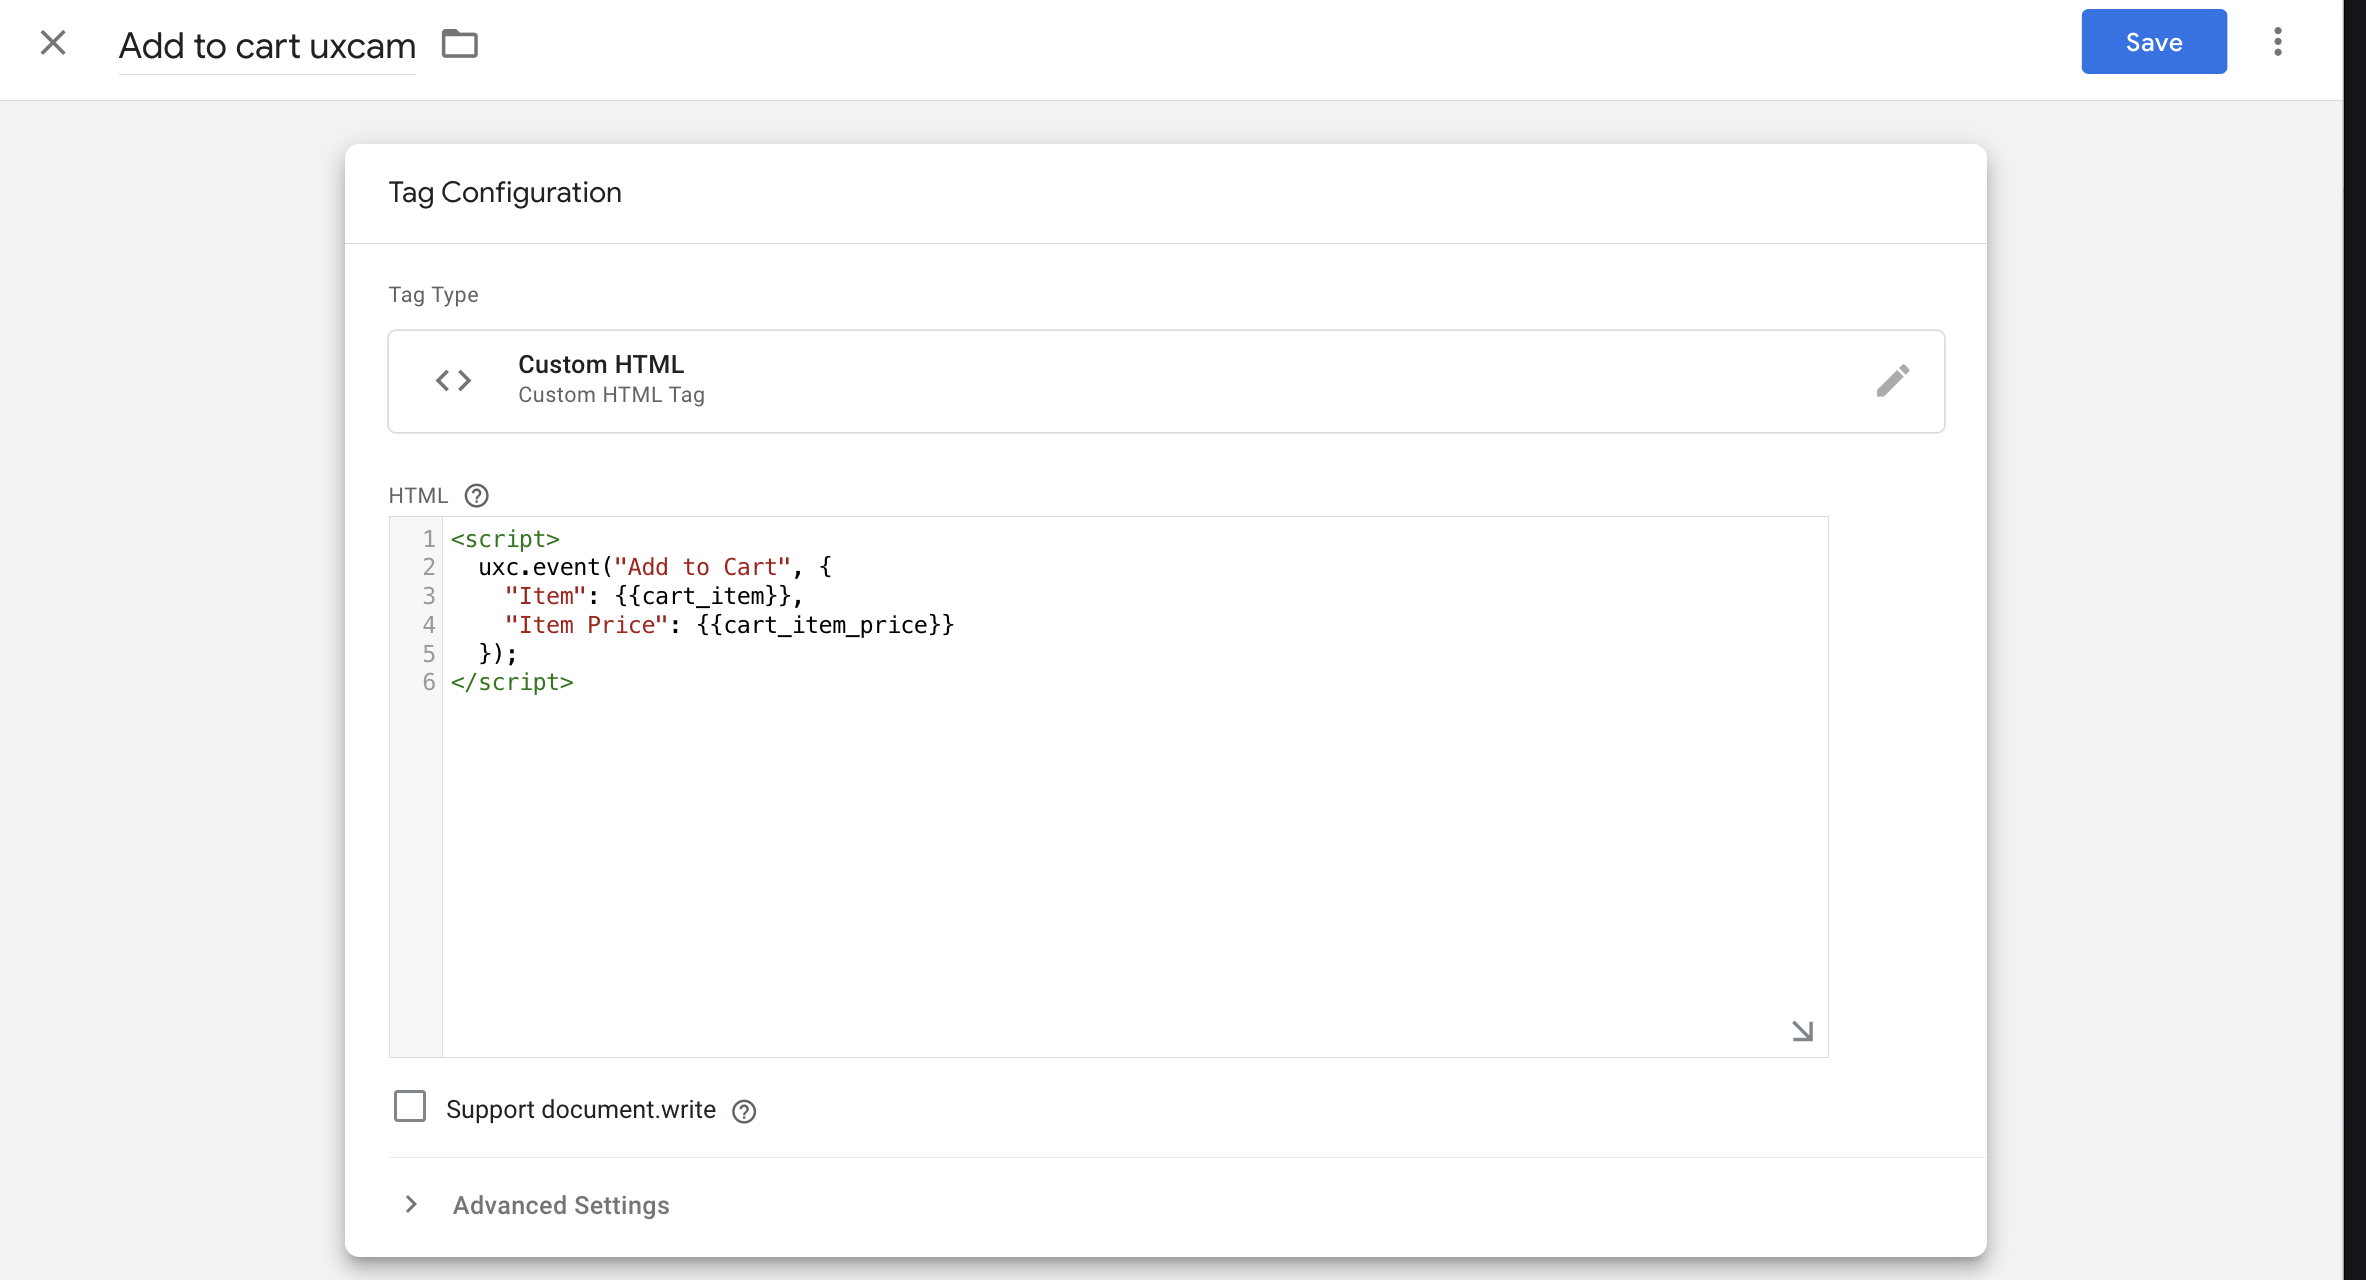
Under Triggering, select an existing trigger or create a trigger for your event (e.g., Custom Event → event name: AddToCart)
Please note that when referencing variable names, you refer to the name you gave to the variable in GTM (top-left-corner)
Step 4: Test Before Publishing
- Use Preview mode in GTM
- Trigger the event on your website
- Confirm:
- The tag fires when expected
- Variables are populated correctly
- Events show up in UXCam (in the session timeline or event page)
Once confirmed, Publish your GTM container.
Final Notes
- Make sure the UXCam script is loaded before the event fires.
- Always sanitize and validate dynamic values being pushed to UXCam.
- Use clear naming for events and properties to stay consistent in UXCam reports.
Updated about 2 months ago