Shopify
This guide will walk you through integrating the UXCam Web SDK into your Shopify website and sending custom events using Liquid tags. Follow the steps below to set up the SDK and capture key user interactions.
Prerequisites
- An active Shopify account with access to theme editing.
- Your UXCam App Key. You can find this in your UXCam dashboard under Settings > Project Settings.
NoteNote
Note:
Liquid tags allow you to dynamically insert Shopify data (such as product details or customer information) into your JavaScript code. This ensures that events sent to UXCam are accurate and relevant to the context of the page being viewed. They are particularly useful for tracking user-specific data and page-specific events.
Step 1: Adding UXCam Web SDK to Shopify
1. Access the Shopify Theme Editor
- Log in to your Shopify Admin.
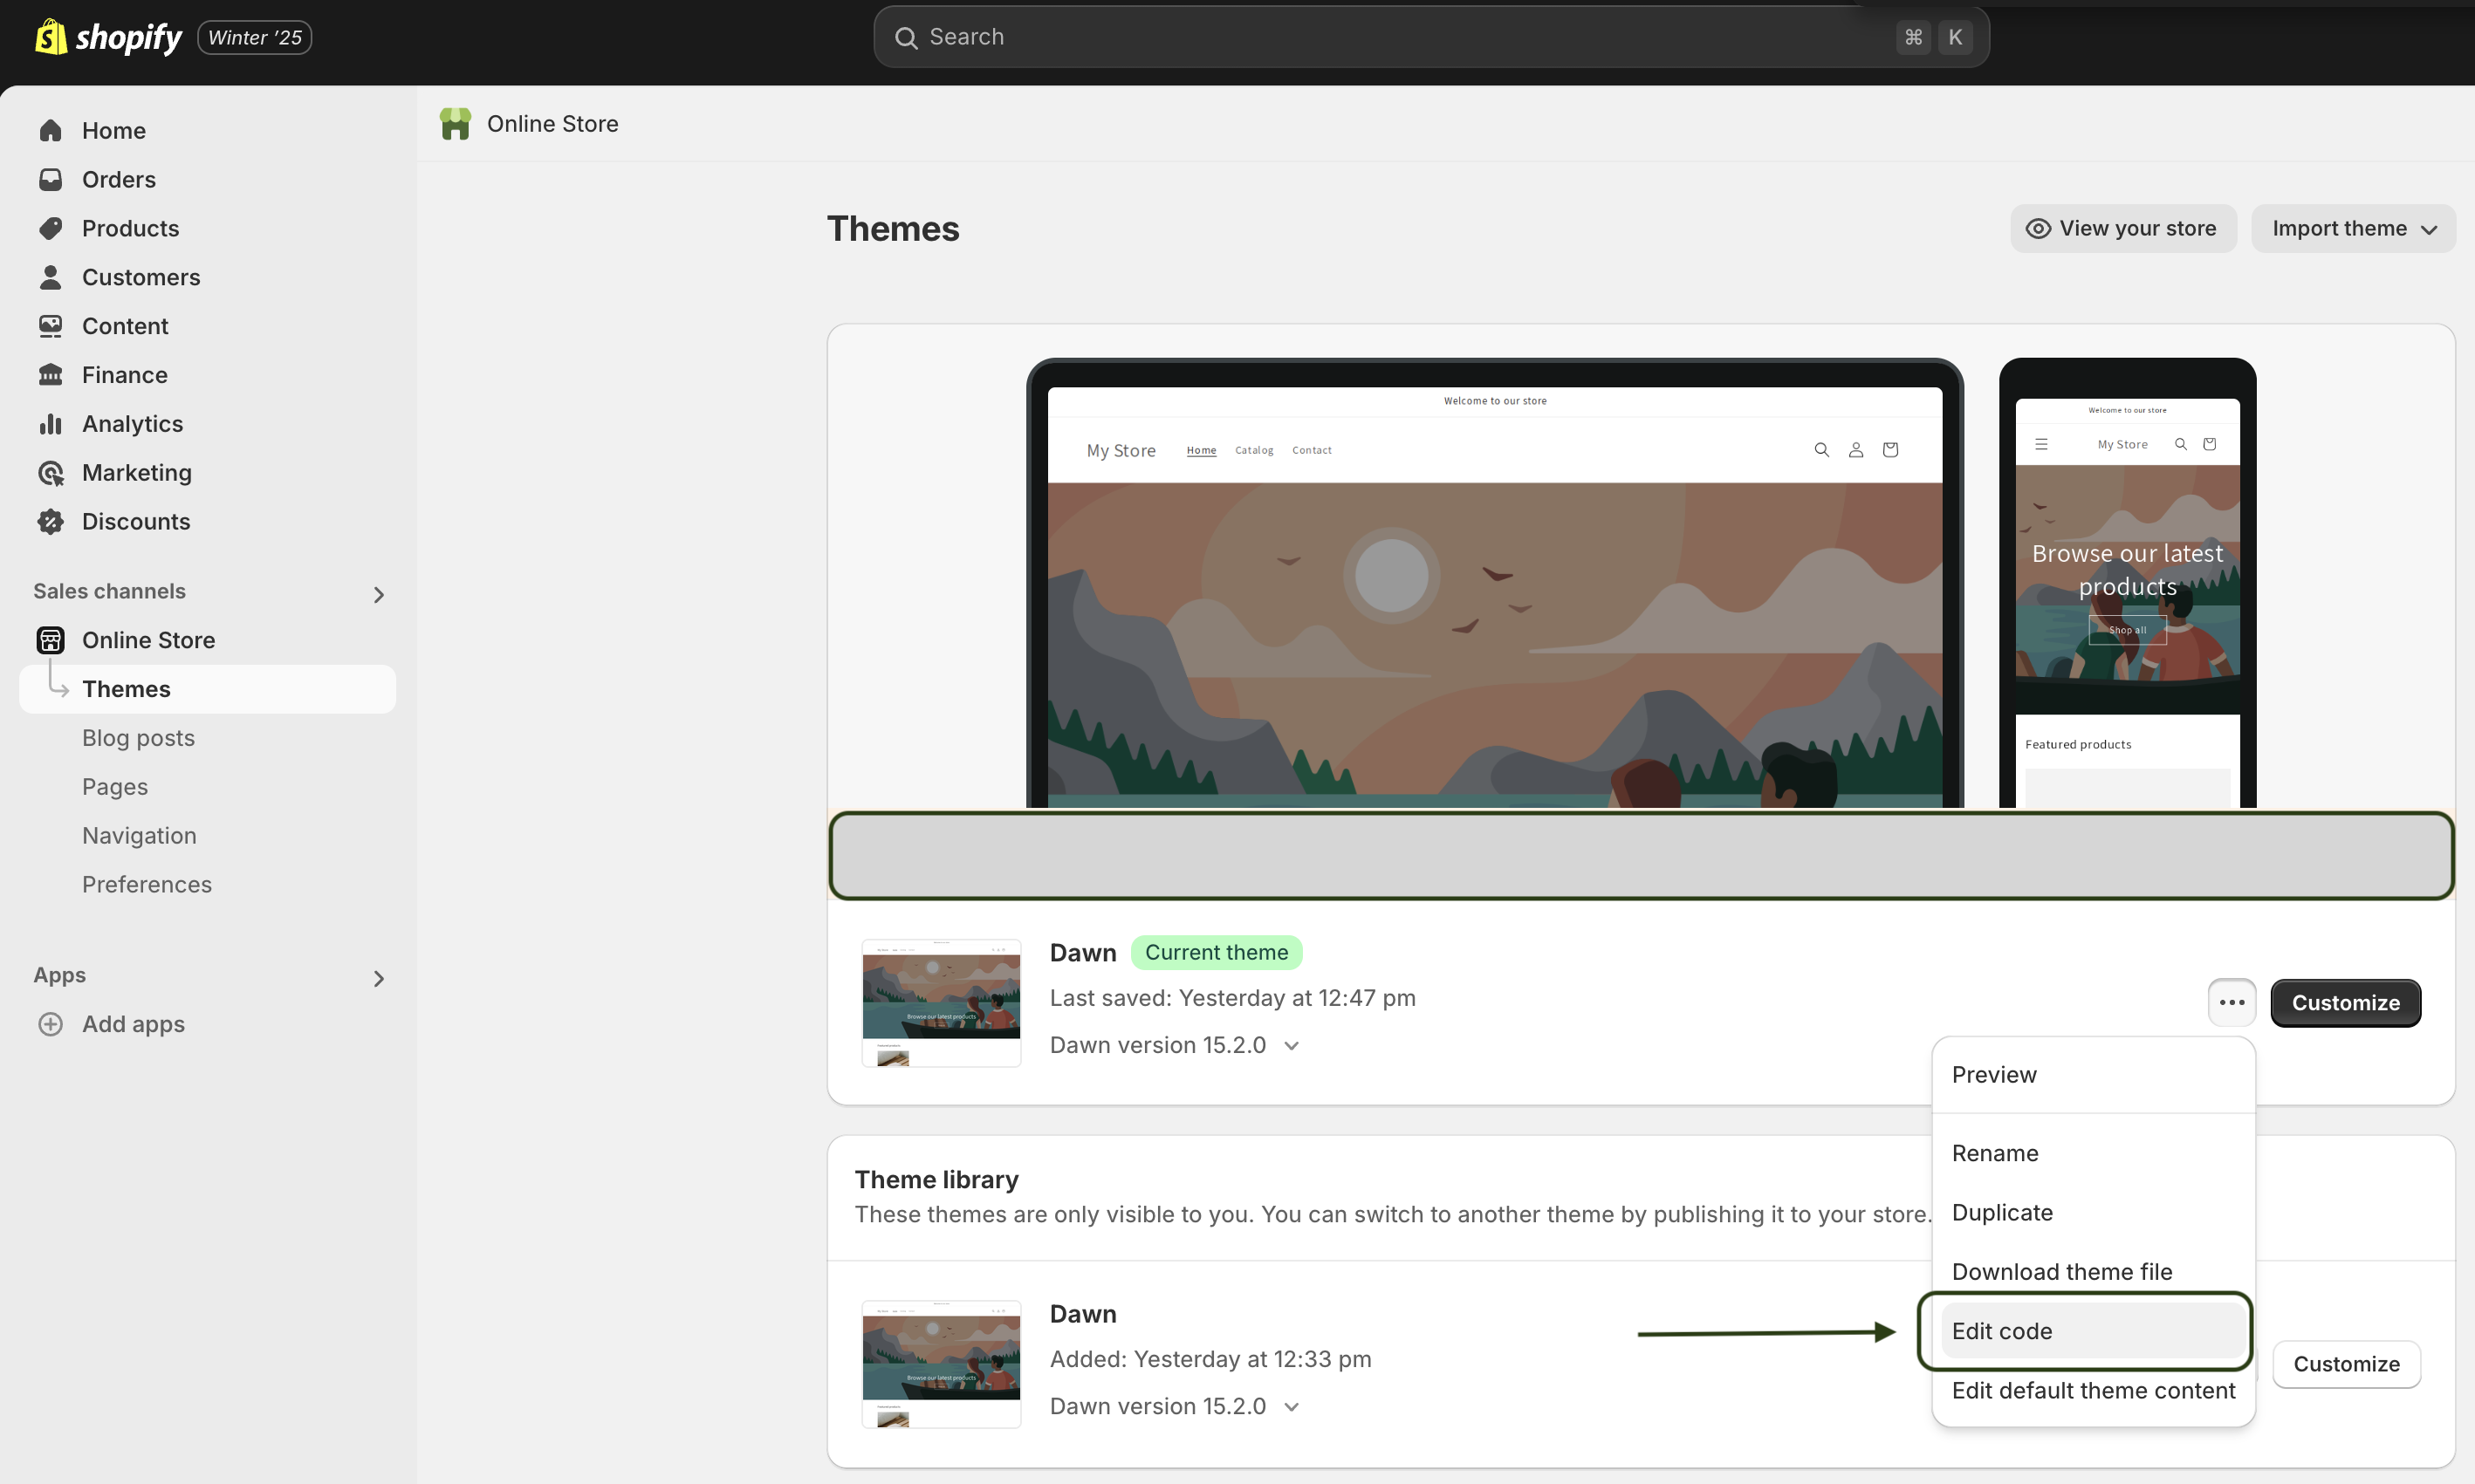
- Go to Online Store > Themes.
- Select your active theme and click Actions > Edit Code.

2. Add the Web SDK Script
- In the Layout section, locate the theme.liquid file.
- Add the following script before the closing tag:
<script type="text/javascript" defer="">
  (function( appKey, opts ) {
    window.uxc = {
      __t: [],
      __ak: appKey,
      __o: opts,
      event: function( n, p ) {
        this.__t.push( [ 'event', n, p ] );
      },
      setUserIdentity: function( i ) {
        this.__t.push( [ 'setUserIdentity', i ] );
      },
      setUserProperty: function( k, v ) {
        this.__t.push( [ 'setUserProperty', k, v ] );
      },
      setUserProperties: function( p ) {
        this.__t.push( [ 'setUserProperties', p ] );
      },
    };
    var head = document.getElementsByTagName('head')[0];
    var script = document.createElement('script');
    script.type = 'text/javascript';
    script.src = '//websdk-recording.uxcam.com/index.js';
    script.async = true;
    script.defer = true;
    script.id = 'uxcam-web-sdk';
    script.crossOrigin = 'anonymous';
    head.appendChild(script);
  } )( 'YOUR_APP_KEY', {} );
</script>- Replace YOUR_APP_KEY with your actual UXCam App Key.
- Save the changes.
NoteNote
Important:
Adding this script to the theme.liquid file ensures that the UXCam functionality is applied to every screen on your Shopify website.
Step 2: Sending Custom Events
You can use Shopify’s Liquid conditions to load JavaScript on specific pages and send custom events based on user actions.
Example: Sending Events on Product Pages
To track interactions specific to product pages, use Liquid tags to dynamically insert product information:
- Open the product.liquid file under Templates.
- Add the following script:
<script>
  document.addEventListener("DOMContentLoaded", function() {
    uxc.event("Product Viewed", {
      product_name: "{{ product.title }}",
      product_id: "{{ product.id }}"
    });
  });
</script>
This will send an event whenever a product page is viewed, including the product's name, ID, and price.
Example: Sending Events on the Checkout Page
To track checkout-specific actions, modify the checkout.liquid template:
<script>
  document.addEventListener("DOMContentLoaded", function() {
    uxc.event("Checkout Started", {
      total_price: {{ checkout.total_price | money_without_currency }},
      item_count: {{ checkout.line_items.size }}
    });
  });
</script>
Example: Sending a Page View Event on All Pages
You can conditionally load JavaScript for specific pages in the theme.liquid file. For example:
<script>
  document.addEventListener("DOMContentLoaded", function() {
    {% if template == 'index' %}
      uxc.event("Home Page Viewed", {
        page_title: "Home Page"
      });
    {% elsif template == 'product' %}
      uxc.event("Product Page Viewed", {
        product_name: "{{ product.title }}"
      });
    {% elsif template == 'cart' %}
      uxc.event("Cart Viewed", {
        item_count: {{ cart.item_count }}
      });
    {% endif %}
  });
</script>
Step 3: User ID and Properties
Identify Users
If you have a customer login system, use Liquid tags to set the user identity dynamically:
<script>
  document.addEventListener("DOMContentLoaded", function() {
    {% if customer %}
      uxc.setUserIdentity("{{ customer.id }}");
      uxc.setUserProperties({
        email: "{{ customer.email }}",
        name: "{{ customer.first_name }} {{ customer.last_name }}"
      });
    {% endif %}
  });
</script>
Conclusion
This concludes the documentation for integrating the Web SDK. If you have any questions or need further assistance, please contact [email protected].
Updated 2 months ago
